|
In Chapter 16, you will be sent to look for someone to help you by Mayor Domino. Your clue is when you say "mayor", they respond with "IS THE BEST".
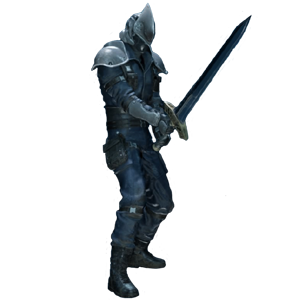
You will find him in the recreation room, next to a combat simulator. Of course you will have to enter a sim combat to go forward. You will be doing the "Three Person Vs. Mayor is Best". It is a pretty straight forward fight. Once you finish the fight, a series of simulator battles will open up. Below is the list of enemies and the rewards you will get for each.
Three Person Vs. Mayor is Best
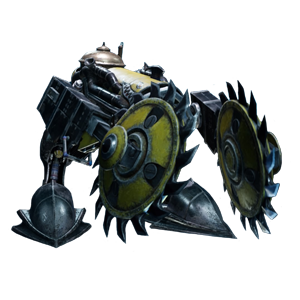
Bring your Lightning Materia into this fight. The Cutter's are really weak to this magic of course. Give someone a Healing Materia + Magnify Materia. Who ever is your main fighter, set them up with First Strike, and perhaps Steadfast Block. These Cutters are no different than any time you have fought them. This is a straight forward fight.
| Round 1: Cutter x2 |
 |
| Battle Challenge |
Reward |
| Three-Person vs Mayor is Best |
Mega-Potion |
Once you complete this combat simulator, it will open a new set of battles. These first set here can be done as any others prior in the colosseum. You can complete them on any difficulty mode. You will get a 50% HP/MP boost at the beginning of each fight. You will also have no access to your items. But this first set of battles are also with enemies already fought. Nothing different here. That time is coming now.
Cloud|Aerith|Tifa|Barret Vs. SOLDIER Trainees
Bring in Lightning and Fire to ease these battles. Certainly you should equip a high level Chakra Materia. First Strike can also bring you in ahead of each fight. You might have some trouble with the Phantom and the Cutter. But other than that this set of battles are very straight forward.
| Round 1: Sahagin Prince x1 |
 |
| Round 2: Phantom x1 |
 |
| Round 3: Grungy Bandit x1 |
 |
| Round 4: 3-C SOLDIER Operative x1 |
 |
| Round 5: Cutter x1 |
|
| Battle Challenge |
Reward |
| Cloud vs SOLDIER Trainees |
Cog Bangle |
| Barret vs SOLDIER Trainees |
Supreme Bracer |
| Tifa vs SOLDIER Trainees |
Rune Armlet |
| Aerith vs SOLDIER Trainees |
Geomatric Bracelet |
Two Person Vs. High Flyers
For me, my team was Cloud and Tifa. Tifa is far more dangerous to the flying enemies seemingly than any others. Bring her in with First Strike and Lightning + Elemental Materia. Cloud actually becomes my kind of healer and back up. Set him up with a Prayer Materia, as well as a Healing Materia just in case. Set him with his Mythril Saber. I give him a second Lightning Materia for some back up damage.
| Round 1: Bugaboo x1 |
 |
| Round 2: Slug Ray x2, Varghidpolis x2 |
  |
| Round 3: Monodrive x4, Terpsicolt x2 |
  |
| Round 4: Elite Helitrooper x1 |
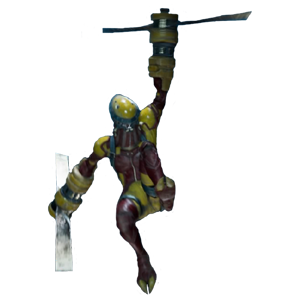 |
| Round 5: Rust Drake x1 |
 |
| Battle Challenge |
Reward |
| Two-Person vs High Flyers |
Gil Up Materia |
Three Person Vs. Team Ragbag
Again no enemy you have not fought before. Each character should have a Healing Materia. Definitely give Steadfast Block to Tifa. Cloud should get a First Strike and ATB Stagger. Certainly give him Time and Ice. Lightning + Magnify should go to Cloud. Barret needs Steadfast Block and Provoke. He is a tank character....use him like it. Set him up wiht a Revival Materia since you will not be using him mainly. Bring in your top summons. Leviathan, Fat Chocobo, and Shiva are great here.
| Round 1: Abzu Shoat x1 |
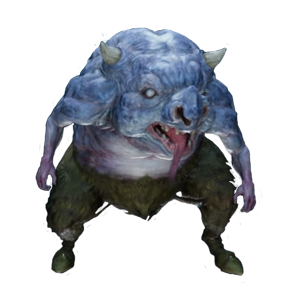 |
| Round 2: Trypapolis x1, Varghidpolis x2 |
 |
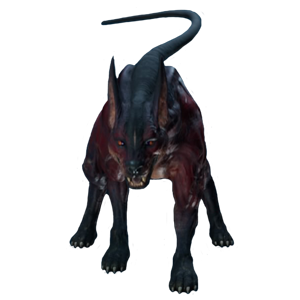
| Round 3: Hellhound x1, Blood Hound x2 |
  |
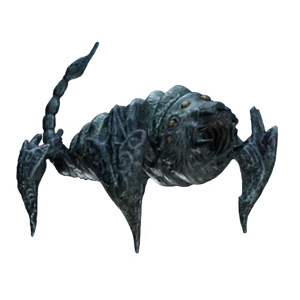
| Round 4: Smogger x1, Ringmaw x2 |
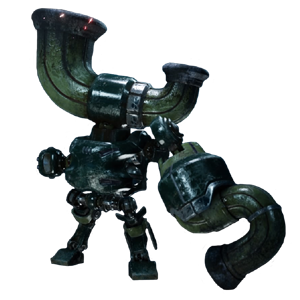  |
| Round 5: Blast-Ray x1, Sweeper Prototype x1 |
  |
| Battle Challenge |
Reward |
| Three-Person vs Team Ragbag |
EXP Up Materia |
 Once you complete the list of sim battles above, there will be no more available to you....until you complete the main story game. When the game completes, there is a new Simulator opened in Chapter 17. Once you leave Aerith's room, head towards the elevator. Chadley will stop you there, and let you know he has set up a new simulator for you to partake in. But there is some criteria to be met first. Once you complete the list of sim battles above, there will be no more available to you....until you complete the main story game. When the game completes, there is a new Simulator opened in Chapter 17. Once you leave Aerith's room, head towards the elevator. Chadley will stop you there, and let you know he has set up a new simulator for you to partake in. But there is some criteria to be met first.
You have to complete all of the Corneo Colosseum tournaments.
You have to have completed all of the Shinra Combat Simulators provided to this point.
You have to complete all of Chadley's Battle Intel Reports.
Once all 3 of these are met, you will find Chadley. The most missed ones are Aeriths single battle in Corneo Colosseum, and the Revival Materia being mastered to open the final VR Mission against Bahamut. Simply head to Chapter 9 with Aerith, and make sure she finishes all of the challenges in Corneo Colosseum. You also have to make sure you COMPLETE THE CHAPTER. The game does not record completions, unless you finish the chapter the completion is in.
As long as you grabbed the Pedometer Materia in Chapter 14 outside of Aerith's house and turned it into the AP Up Materia, getting Revival Materia mastered is a sinch in this new game + mode. You get 3x AP gain on its own merrit. When you add the AP Up it stacks the gain on top. So you should be able to easily reach the 5000 AP required to master Revival.
Before getting into the battles there is one thing that cannot be changed.....
ALL BATTLES FROM HERE TO THE END ARE ON HARD MODE ONLY!!!!!!
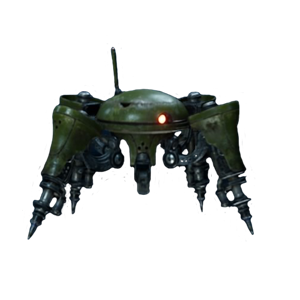
Cloud|Aerith|Tifa|Barret Vs. 3-C SOLDIER Candidates
| Round 1: Unknown Entity x1, Enhanced Shock Trooper x1 |
  |
| Round 2: Zenene x1 |
 |
| Round 3: Sledgeworm x1 |
 |
| Round 4: Armored Shock Trooper x1 |
 |
| Round 5: M.O.T.H Unit x1 |
 |
| Battle Challenge |
Reward |
| Cloud vs 3-C SOLDIER Candidates |
The Art of Swordplay Vol. XIII |
| Barret 3-C SOLDIER Candidates |
Sharpshooter's Companion Vol. XIII |
| Tifa vs 3-C SOLDIER Candidates |
Way Of The Fist Vol. XIII |
| Aerith vs 3-C SOLDIER Candidates |
Telluric Scriptures Vol. XI |
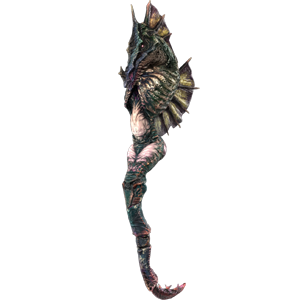
Two Person Vs. Dynamic Duos
| Round 1: Phantom x1, Ghost x1 |
  |
| Round 2: Elite Shock Trooper x1, Elite Helitrooper x1 |
 |
| Round 3: Grungy Bandit x1, 3-C SOLDIER Operator x1 |
|
| Round 4: Hellhound x1, Zenene x1 |
|
| Round 5: Sweeper x1, Queen Grashtrike x1 |
  |
| Battle Challenge |
Reward |
| Two-Person vs Dynamic Duos |
Refocus Materia |
Two Person Vs. Monsters of Legend
| Round 1: Bomb x1 |
 |
| Round 2: Tonberry x1 |
 |
| Round 3: Type-0 Behemoth x1 |
 |
| Round 4: Bomb x1, Tonberry x1 |
|
 |
Two-Person Vs. Monsters of Legend Round 5 |
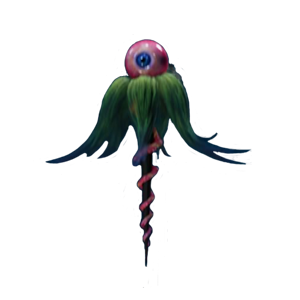
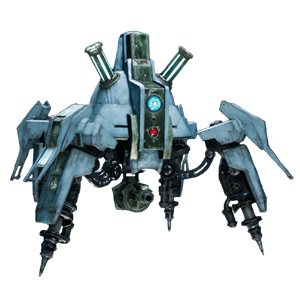
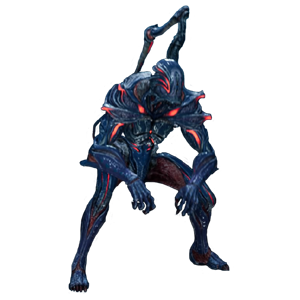
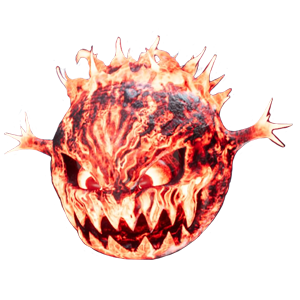
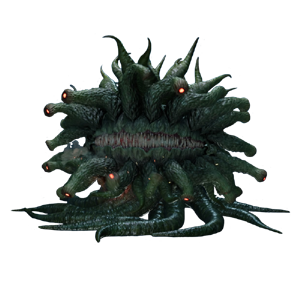
| MALBORO x1 |
Aim for their mouth when they use Bad Breath or Chow Down, as hitting them there will make them susceptible to staggering.
Bad Breath can be learned from this monster. You have to be in front of him to get hit with it.
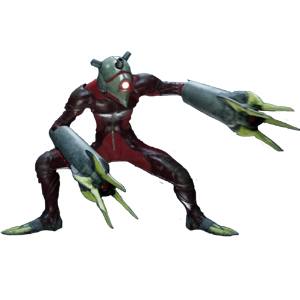
Okay this is the first of the unique fights of the simulator. And it can easily decimate your entire party. The two things everyone wants to have is Lightning Materia and Cleansing Materia on at least one character (3 is better) for Esuna. You are certainly going to need it in this fight. This Big, Bad, Ugly is easily staggered with Lightning...but there is a catch to it.
When Malboro opens its mouth to use Bad Breath or Test Bite, its mouth is able to be targeted. If you attack its mouth with Lightning, it will fill a good deal of the Stagger.
We all know its big attack...Bad Breath. This will unleash a plethora of statis effects on you. Esuna is a MUST HAVE. Bring in accessories to help in nullifying some of the negative effects.
Malboro will occasionally use Test Bite and swallow up its target, similar to the Hell House fight. If you deal enough damage while it's munching your party member you'll be able to rescue them. So hit him with strong ability attacks.
The Bad Breath attack will inflict you with poison, sleep, silence, and toad. If you're unlucky have an unafflicted party member cast Esuna and resume the battle. It is good to keep at least one player behind Malboro to avoid getting hit. Just have them cast the Esuna, and go. Once you get the ability on your Enemy Skill, hit it from the sides or behind only. Bring Chakra and Prayer to remove the burden of healing from your MP. |
| Battle Challenge |
Reward |
| Two-Person vs Monsters of Legend |
Refocus Materia |
Three Person Vs. Top Secrets
This is the final battle sim in Final Fantasy VII Remake. And they surely left the best for last.
You will be facing all your summons in the first 4 rounds. They are no different from your previous encounters through Chadley's VR Missions. If you have faced and defeated them on Hard Mode for fun...no problem here. Save for one.
In the encounter with Bahamut, he will be able to summon Ifrit. That is right, you will be facing two summons in one battle. Might seem like something of a "Hellfire", but if we can get set up right, you should be able to get passed it.
Alright let's get to a set up.
  Our big boy Cloud needs to have Hardedge at level 6. Equip him with a Force Bracelet. Transference Module is a neat thing here, as Cloud has an absolute BOSS of a limit break in Ascension that does just amazing damage. Our big boy Cloud needs to have Hardedge at level 6. Equip him with a Force Bracelet. Transference Module is a neat thing here, as Cloud has an absolute BOSS of a limit break in Ascension that does just amazing damage.
In his weapon slots set in Healing (Chakra), Barrier, Revival, ATB Stagger, ATB Assist, and Steadfast Block Materia's.
In his armor slots set HP Up x2, and then finish with a Ice + Elemental Materia. Then set him up with Bahamut.
 For Tifa she should have a level 6 Metal Knuckles weapon, Force Bracelet, and set her with a Champion Belt. For Tifa she should have a level 6 Metal Knuckles weapon, Force Bracelet, and set her with a Champion Belt.
Set her weapon up with Time, Revival, Healing (Chakra), Parry, First Strike, and ATB Stagger Materia.
For her armor set in Steadfast Block, Skill Master, and 2 HP Up Materia. Give her Fat Chocobo for the summon.
  I went in the beginning with Barret, because that is what a whole lot of strategies out there went. But I could not get passed Bahamut and Ifrit. So I switched it up with Aerith. with a few changes to materia....and I got it. I went in the beginning with Barret, because that is what a whole lot of strategies out there went. But I could not get passed Bahamut and Ifrit. So I switched it up with Aerith. with a few changes to materia....and I got it.
Give our favorite flower lady her level 6 Mythril Rod, and a Chain bangle. Pop a Circlet on for an accessory.
Give Aerith a Healing + Magnify, 2 MP Up, and 2 HP Up Materia in her weapon.
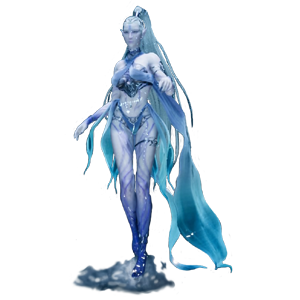
For her armor set her with Fire + Elemental, Lightning, and Revival Materia. And finally set her up with the Leviathan Summon.
Now this set up is not 100% for everyone, since everyone has the ability to play the characters completely different. This one worked for me. I got through it, and hopefully I never have to ever do it again. (Was not very good with Hard mode at the time of writing) But it was successful enough to get me through this toughest of all combat simulator battles....and perhaps most difficult of fights in the game itself.
Battling through the summons
| Round 1: Shiva |
 |
With Cloud's elemental absorbtion of Ice, Shiva suddenly becomes something of a pushover. Bring on his attacks in full force. When she is staggered, switch over to Tifa to deal out her stagger damage. When she gears up for Diamond Dust, make sure everyone is healed up. She should not take too long to defeat. |
| Round 2: Fat Chocobo |
 |
Aside from healing, there is no true need for magic in this fight. Fat Chocobo is slow-moving, and can easily be dodged. Keep punishing him with strong attacks from Cloud and Tifa. When the Moogles summon enemies, stop attacking Fat Chocob, and get rid of them fast. The Tonberry enemies especially. When Fat Chocobo gets staggered, once again bring Tifa in to drop a ton of HP. |
| Round 3: Leviathan |
 |
The only plus with Leviathan is he takes a bit of time to perform abilities. When you see one appear above him, get ready to block the attack. It will keep you out of the certain HP danger zone you will end up in. When he begins to do Briny Bellow, switch over to Aerith, and have her run to the far side of the ring. When it is performed, switch immediately to Cloud to get in several free shots.
When he begins gearing up for Tidal Wave, stop everything and get everyone healed. You should also get as many people under Manaward as possible. If Leviathan is close to stagger, hit him fast and hard. Staggering him will cancel Tidal Wave. |
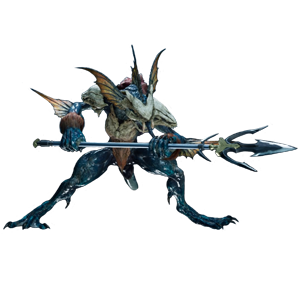
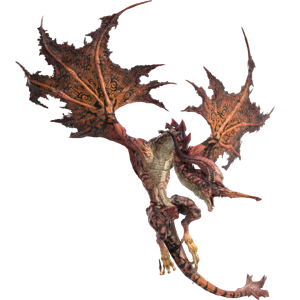
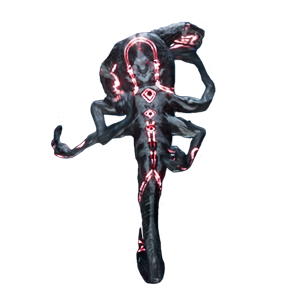
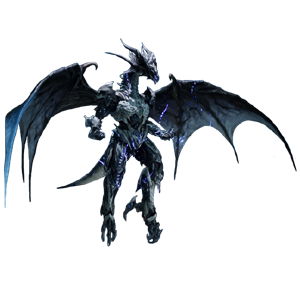
| Round 4: Bahamut, Ifrit |
 |
Bahamut....oh Bahamut is the, in my opinion, most difficult fight in the entire game. This includes the final match.
His Mega-Flare can kill you like right now. Manaward and Reprieve on your weapons can be life savers. If it is still not working well, perhaps a pair of Revival Earrings can give an extra chance.
When he begins the countdown, just lay into him with the absolute hardest hitting attacks to push him into Stagger. Stagger will cancel out Mega-Flare. Try to save Cloud's Ascension to rail out massive HP when Bahamut is staggered.
About 1/2 way through the battle, Bahamut pulls a fast one on you by summoning Ifrit. Here is where I failed a lot. Ignore Ifrit. No seriously ignore him. Keep all focus on Bahamut. Ifrit's attacks are not as hard hitting, and will be keeping Aerith healed. You need to bring down the one who can one-shot you. After Bahamut goes down, then turn your focus on Ifrit. Ifrit can be taken out pretty quick. And again with Aerith absorbing the fire attacks, there is little worry on remaining in the fight. Do try and keep everyone's health up regardless. Hit him with Ascension and Dolphin Flurry as they become available. |
 |
Three-Person Vs. Top Secrets |
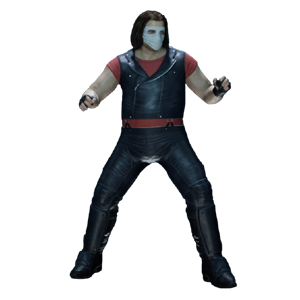
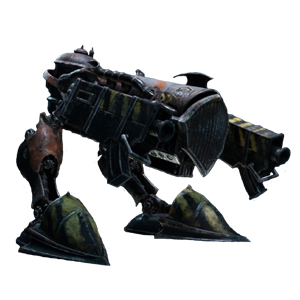
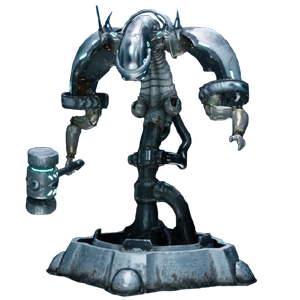
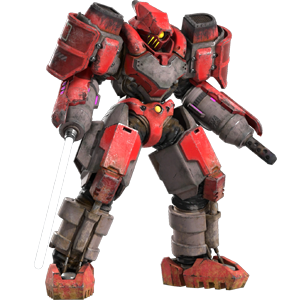
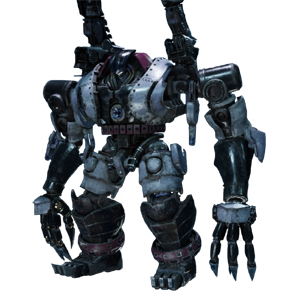
| Round 1: Pride and Joy Prototype x1 |
After the last battle, this fight is kind of a breeze. And thank God for that. Most of Prototype's attacks are directed to the front of him. And as long as you remain in the backside, or to the sides, you should be doing pretty alright. There is an attack that deals range damage. It is notified by Prototype raising its arms. So when this happens, get everyone out of the way of it.
Also Prototype will sometimes set a good deal of the ring a blaze. Be sure to keep Tifa and Cloud out of the fire areas. Take this time to pop off a few Lightning spells if you can.
Prototype will also occasionally try and grab one of your party. If he succeeds, your character will eventually get KO'ed. You can wait to revive them when this happens, or you can actually try to break his arm and cause him to drop them. It is certainly a hard thing to do, but not impossible. If they do die, get them back immediately.
Keep pounding away with strong attacks, hit him with Bahamut if allowed, and Pride and Joy will quickly become Shame and Sadness as you kick him in the backside of his canister.
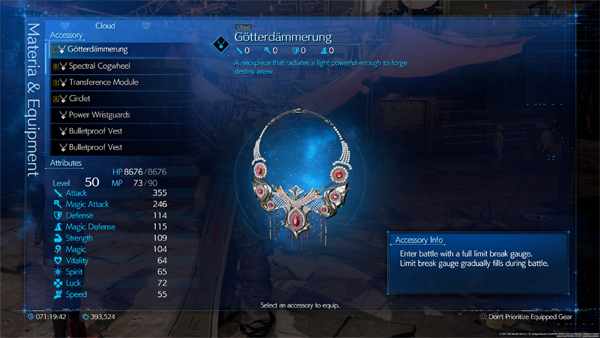
So what was the point of this set of missions....? The Gotterdammerung Accessory. This bad boy lets you begin a battle with a full Limit gauge and slowly fills it during the fights. Stick this on Cloud, and have a time of it. |
|


 2005-2024 Final Fantasy Kingdom, & I.M. Meckem Web Design.