|
Battle Arena
Welcome to the battle arena. This is an completely optional area of Circle of the Moon. You do not need to complete the Battle Arena to finish the game, but you do get some great prizes for doing so. Also for those who make it out of the Arena in one piece, the Exp you get is a whopping 291,582!! There should be no reason for not leveling up a few times each run through. But do not think this is an easy run through some battles...it is FAR FROM IT. The enemies in the Battle Arena are given higher HP and stats than their Normal counterparts found throughout the rest of the castle. And they come in quite a few numbers. You should get some preparations together before you ever try to get into the Arena. Lets go over some of the things you will want to have before you enter.
 - This is definitely the sub-weapon of choice. All other aerial sub-weapons are too weak, and there is very little on the floor for Holy Water to be effective.If you do not have a Boomerang, fear not. There is one at the top of the entrance, before you go into the first battle. - This is definitely the sub-weapon of choice. All other aerial sub-weapons are too weak, and there is very little on the floor for Holy Water to be effective.If you do not have a Boomerang, fear not. There is one at the top of the entrance, before you go into the first battle.
 - Get as many of these as you can. The Spearfish found in the Underground Waterway is a great source for these. I gathered a total of 10 before entering. - Get as many of these as you can. The Spearfish found in the Underground Waterway is a great source for these. I gathered a total of 10 before entering.
 - These are a lifesaver, but harder than heck to get. Only the Alraune drops these, and it is a very, very rare drop at that. I got one about every 15-20 minutes, with my luck as high as it could go. The plus side is I gained several levels while doing this task. These flower girls can be found in the Observation Tower. - These are a lifesaver, but harder than heck to get. Only the Alraune drops these, and it is a very, very rare drop at that. I got one about every 15-20 minutes, with my luck as high as it could go. The plus side is I gained several levels while doing this task. These flower girls can be found in the Observation Tower.
 - You will want at least 10 of these simply for the room filled with Marionettes and Legions. And what do you know, you can get the Cure Curse easily from Marionettes found in the Chapel Tower. - You will want at least 10 of these simply for the room filled with Marionettes and Legions. And what do you know, you can get the Cure Curse easily from Marionettes found in the Chapel Tower.
 - Take about 7-10 of these with you. There is a room or two with Poisonous enemies. It will help if you get nailed by them. - Take about 7-10 of these with you. There is a room or two with Poisonous enemies. It will help if you get nailed by them.
 - The dark Armor was the armor of choice for me. I know the complaint that it brings down your other stats, but Defense is the key to getting victory in here. And it is only a 10 point drop in the other stats anyways. This armor can only be gotten from the Lilim in the backwards L-shaped secret room in the Machine Tower. - The dark Armor was the armor of choice for me. I know the complaint that it brings down your other stats, but Defense is the key to getting victory in here. And it is only a 10 point drop in the other stats anyways. This armor can only be gotten from the Lilim in the backwards L-shaped secret room in the Machine Tower.
 - I got ahold of two of the Double Grips. This will give you a boost of 150 to your strength, without losing other stats. Though you want a lot of strength, you do need some luck to get teh Black Dog and Unicorn DSS cards. The Double grips are dropped by the Dark Armors found in the Observation Tower. - I got ahold of two of the Double Grips. This will give you a boost of 150 to your strength, without losing other stats. Though you want a lot of strength, you do need some luck to get teh Black Dog and Unicorn DSS cards. The Double grips are dropped by the Dark Armors found in the Observation Tower.
Leveling up: You will want to be at least level 50-65, before going in this. You can go earlier if you want, but it is very difficult to do. You might wonder where you can level up quickly. It took me some time to figure out the best of the best is not actually the Devil in the Observation Tower. Though he does give you 10000 Exp, there is another enemy who gives you more.
The Lilith  is found in the secret room off the tall, left most corridor in the Underground Warehouse. This corridor is found directly above Death's room. In this secret room, you will find the Lilith. They are a bit rough to fight, but should not be too much of a problem. Each Lilith gives a whopping 20000 Exp! This is the highest exp you can gain from an enemy. I say go with Lilith all the way. You can also obtain Mind Ex's from them, which can be used if you use the cheat seen below. is found in the secret room off the tall, left most corridor in the Underground Warehouse. This corridor is found directly above Death's room. In this secret room, you will find the Lilith. They are a bit rough to fight, but should not be too much of a problem. Each Lilith gives a whopping 20000 Exp! This is the highest exp you can gain from an enemy. I say go with Lilith all the way. You can also obtain Mind Ex's from them, which can be used if you use the cheat seen below.
Magical Cheat
Though you lose all of your MP, there is a way to get it back for a short time. Go into your menu, and restore your MP to almost full, or full. Now enter the DSS menu, and select which summon you would like to use. I used this with the Thunderbird for attack, and it saved me once or twice with Unicorn for restoring HP. After you have selected the summon, go back to the game, and hit L-Trigger. Then as quickly as you can perform the summon. If you were fast enough, the summon will go through. This trick can be a real saver in those really full rooms, or when you need a HP boost. But try not to use MP. It does take away from the challenge, as well as make you feel bad for cheating in the first place. But in a pinch it can save your life.
Let the battles begin!
 |
|
 |
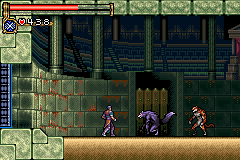
 x1 x1  x1 x1
This is a very easy room. Just be sure to watch for the hesitation of the Were-Wolf before he attacks, and the lunging of the Were-Jaguar. |
|
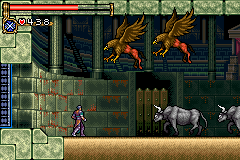
 x2 x2 x2 x2
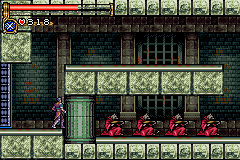
Take out the Catoblepas first. Be sure to watch out for the stone dust on the ground. Follow this up with attacking the Griffons. |
 |
|
 |
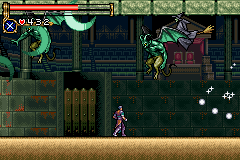
 x2 x2 x3 x3
Be sure with these guys, that they do not bunch up. This could easily be your doom. The easiest to kill is the Witches, so make them first pick. Then go after the Wind demons one at a time. |
|
 x3 x3 x12 x12
After the last room, this is pretty easy. Get rid of the Towers, as well as the Rock Knights as quickly as you can. |
 |
|
 |
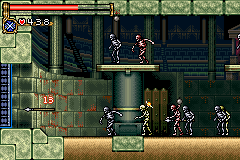
 x6 x6 x5 x5 x4 x4 x2 x2
These guys are easy as pie. Get rid of them quickly, while watching for the Electric Skeletons floor attack. Should be able to get through this room unharmed. |
|
 x2 x2 x7 x7
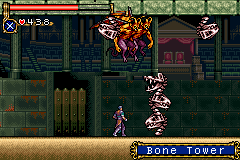
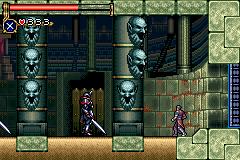
Get rid of the Bone Towers in the middle of the room first. Though they can't be seen from the entrance, they can still attack you. After they are gone, go after the Flame Demons, then finish off the Towers on the ceiling. |
 |
|
 |
 x5 x5
This is another easy room. Just start a continual slide through them. |
|
 x3 x3 x3 x3
Be aware of the Bloody Swords, and try to get rid of them, as you hit the Poison Armors. A few Boomerangs here would not hurt either. If you get poisoned, try to hold off on curing yourself until all three Armors are gone. |
 |
|
 |
 x24 x24
Another simple beyond compare room. Wait until you can get on the top level, and slide through the Abiondargs. Then go through the bottom row. Repeat until all of them are gone. |
|
 x3 x3 x12 x12
Throw a boomerang at the bottom level, then another at the top. If you are lucky, you can wipe the marionettes out, and a single hit should destroy the Legion. Just slowly go across the room repeating this pattern. Get any stray enemies quickly, so you do not succome to curse. If you do get hit, use a Cure Curse quickly. |
 |
|
 |
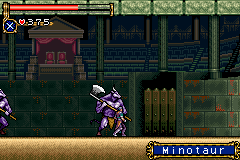
 x7 x7
A very rough room. You need to be in the air, every time the Minotaur attacks. When you come down, try to hit him. Between his attacks, launch boomerangs. Do not be afraid to use a lot of them. Try to keep the amount of Minotaurs down to one at a time. It is rare for them to throw their attacks at the same time. |
|
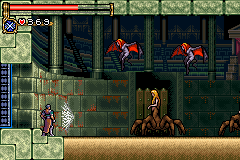
 x3 x3 x3 x3
A pretty easy room. You can go after either first. Just be sure to dodge the sticky webs, and Succubus's laser attacks. |
 |
|
 |
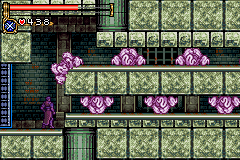
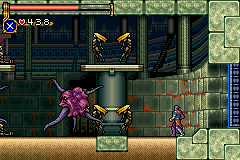
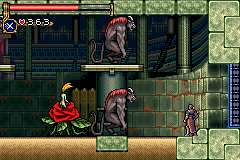
 x5 x5 x2 x2
This one is real difficult on what should be gotten first. The Alraunes have stems that come up out of the ground, and the Demon Lords fire projectiles from above and below. Just get rid of them as quickly as possible. |
|
 x8 x8
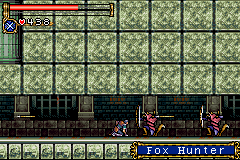
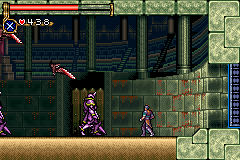
Easy as pie room again. Get above the Hyenas, and when there is a break, go into a slide attack across one section of them. Afterwards, turn around and repeat. |
 |
|
 |
 x3x12 x3x12
The last three rooms are going to be more than difficult. This one is perhaps the second most difficult. Watch the towers, as their attacks turn you to stone. The Demon Armors fire dark projectiles in three different directions, and not in the same direction at the same time. Just work on one Armor at a time, and get rid of the Devil Towers after they are gone. One of these Dark Armors should drop the Black Dog  |
|
 x3 x3
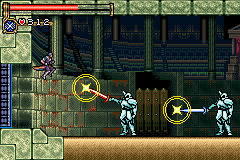
This is the same as the Dark Armors. Each one shoots a light beam in three directions. And they also do not fire in the same direction at the same time. Go through them one at a time, and you should get through in good shape. One of these Light Armors will most likely drop the Unicorn . |
 |
|
 |

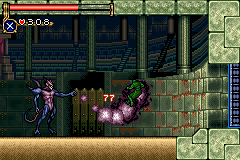
The Devil is one tough demon. He has several darkness attacks in his arsenal, and they can be difficult if not impossible to get away from. Unload everything you have on him. Boomerangs are your best friend here, and do not be afraid to utilize all the potions you have. Sometimes after you defeat him, the Devil will drop a Mirror Mail. But this can also be gotten from the Devil counterpart in the Observation Tower. |
|
Finally, after getting through the entire Battle Arena, you will be rewarded with the Shining Armor. (Mispelled Shinning in the game) This is the best overall armor found in the game. It is a pretty good darn reason for going through the Battle Arena, as wellas the two cards you cannot get anywhere else. |
|