|
Final Fantasy V Advance Sealed Temple
The first visit
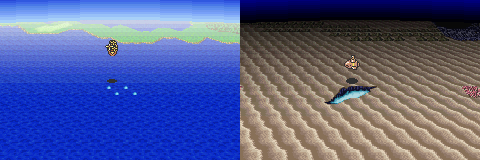
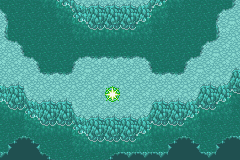
When all of the tablets have been acquired, the Sealed Temple will appear. It is located underwater, south of the Mirage Village. You will be able to see it by the bubbles on the water's surface. Simply go underwater, adn locate the rift.
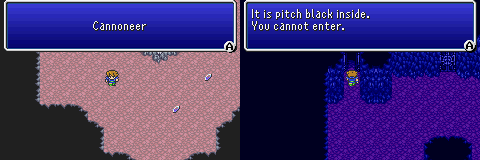
Inside, you will find 3 new jobs for your party: Cannoneer, Oracle, and Gladiator. These are some pretty awesome job classes to have. You will notice a door in the center and the left, that do not open. At this time, you cannot enter them, so simply gather your new crystals.
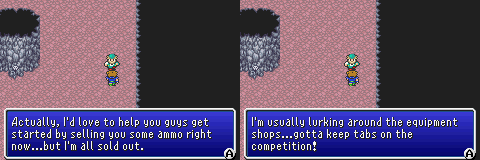
 When you go to leave, a salesman will enter the room. He is looking for treasures to sell, and he thinks there is bound to be some inside. He will then offer to contact his supplier and sell you ammo for your Cannoneer. He will then leave the room. He can be found at random weapon shops from here on out. So if you need some ammo, hunt him down. When you go to leave, a salesman will enter the room. He is looking for treasures to sell, and he thinks there is bound to be some inside. He will then offer to contact his supplier and sell you ammo for your Cannoneer. He will then leave the room. He can be found at random weapon shops from here on out. So if you need some ammo, hunt him down.
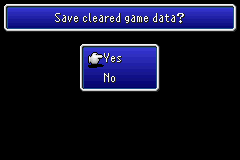
This is all you can do in the Sealed Temple, until you defeat Exdeath in the Interdimensional Rift. Once you do, allow the credits to roll. When "The End" Appears, it will ask if you want to save your game. Do so, and you will then be able to load the save, allowing access to the Sealed Temple.
Sealed Temple Opens
Before you even venture into the Sealed Temple, there is a few things you would need. This is perhaps the toughest of the
Advance series' extra areas, and a few of the boss fights rival those found in the WEAPON fights in VII.
First things you will need is items, and lots of them. 99 of each, if you can manage it.
Potion
Hi-Potion
Ethers
Holy Water
Gold Needle
Elixir
I know what you are thinking...99 Elixirs at 50,000 Gil a pop! Where the heck you supposed to get money like that? Remember
the Void? There is plenty of money to be had there in the last section before Exdeath. And you will more than level up a few
of those Job classes you will need.
Speaking of those classes, here are the classes i would suggest mastering, before entering:
White Mage
Black Mage
Summoner
Red Mage
Time Mage
Gladiator
Oracle
Cannoneer
Mime
Ranger
Ninja
Mystic Knight
Beast Master
Dancer
You could easily add several others into the mix, but these are the ones you will need the most. And as far as the Beast Master goes, only one person will need that ability, and you do need it to continue.
There was no permanent setting of my characters abilities, since you will be changing them almost every boss fight. Edit
The sealed temple is located just to the southwest of the Phantom Village, in Exdeath's World. When you complete the main
quest of Final fantasy V Advance, you will be prompted to save your game as a clear data. From this save, you can continue
into the Sealed Temple.
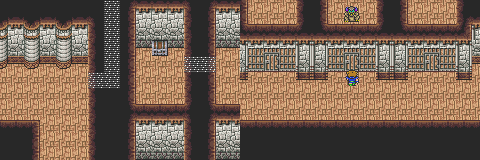
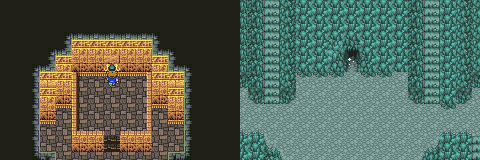
Sealed Temple Cave
When you get out of the submarine and enter the temple this time, you will be able to hit the switch, and you will be shifted through time...I guess. When you regain control of the party, head for the northwestern door. Inside you will find a save point. Trust me, USE IT!
Sealed Temple Entrance
When you go through the door, you will end up in the entrance of the Sealed Temple. This area is similar to the Castle in
the Void. Just head all the way down to the bottom. At the bottom, hang a right, and go through the door. You may have noticed the door in the middle. This will take you to the arena. You cannot get there right now, but keep the location in mind.
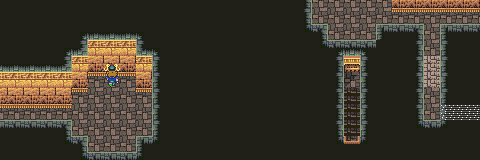
Entrance right side
Inside, head to the left, until you find a path going south. Here you will see two warp points. Both points take you to Titan's Grotto, but in different locations. The top teleporter will take you to the top ledge of the grotto, while the second one will warp you right below the first.
Titan's Grotto
If you took the right warp, and ended up at the top tier, you might want to stop, and head to the left. Drop down the waterfall, and find the chest containing the Vishnu Vest. If you took the second warp, and wound up below the first point, then just head left down the path, and get the Vest. Then from there, head back to where you warped in, if you took the second point. Continue left, and go down the stairs. Follow this area right, past the waterfall, and into the next area.
Titan's Grotto B2
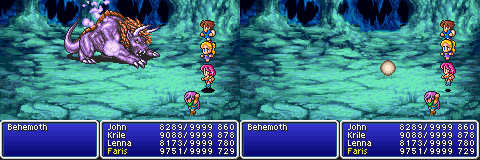
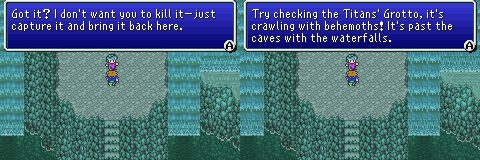
This is where the !Catch ability, and the Kornago Gourd come into play. In this next area, save yourself the effort of doing it later, and fight around. When you go into battle with a Behemoth, you need to catch one. This area is actually pretty straight forward. Go down the first stairs, to get an Elixir. Then go back up, and all the way right. Go down, head left, go down again, head right, and go into the new area. This area is called the Hall of the Watchman.
Hall of the Watchman
In the Hall of the Watchman, proceed to the right. You will notice two paths going north. They lead to a man that carries a potion to turn even the strongest of stone statues into flesh. You can do nothing with him right yet, so keep going to the right. Warp in that point, and you will be taken to the River of Souls.
Sealed Temple Right Entrance
Head in, and to the right. Take a second , if you want, and go through the hidden paths to get the Blastchot, and Buckshots. As you wind around the bottom of the cells, you might notice a Boss-looking figure in the center cell. You cannot fight him right now, but you should keep his location in mind. Head right, and go into the River of Souls.
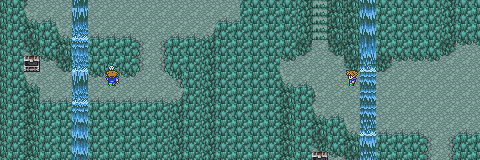
River of Souls B1
Whether or not you got here via the Hall of Watchman, or the Entrances right door, you will end up right in the beginning. Ok, there are actually several ways to get through this area, and into B2. The most direct is to follow the path left, until it turns up, and into the doorway. But you might want to collect the chests with a Iron Draft, Goliath Tonic, and power Drink. Well, this will require a bit of swimming so to speak. The second set of stairs will take you to the land in the center right side. Here you can collect the Iron Draft in the top right corner. Then you can go down the stairs to get to the bottom left land. Grab the Power Drink, and go through the hole in the floor. This will drop you in the bottom of the southeastern most land area.
To get the final chest, you need to take the second to the last set of stairs, grab the Goliath Tonic, and hit the next stairs. These will then take you to the hole in the floor mentioned above.
The final way, is to take the last set of stairs, and you will end up across the spikes from the Goliath Tonic. Here there is a hole in the floor, that will drop you on the center peninsula below the island with a chest on it. In any event, you should not be on the River of Souls B2.
River of Souls B2
If you would like the Elixir found in the chest on the island, you need to get over to the northwestern most area, where the stairs are. If you went through the door, or dropped through the hole by the Iron Draft in B1, you need to head to the stair son the bottom of the land mass, and go across to the other side. Make sure to get the Dark Matter on your way to the stairs. Once on the other side, grab the Turtle Shell and continue up to the stairs. Now go down the second stairs from the left. This will get you to the Elixir. Once you have it, you can go down the stairs, and wind up at the bottom of the beginning land mass, where it splits. Now head up, and find the small path leading east, then south. About half way down the path, you will see something blocking your way. It is your first Boss fight of the temple...Gil Turtle.

|
Gil Turtle |
If you already faced and defeated this guy back in Galuf's world, you will know what to do here. Make sure, before you begin the fight, to cast Float on everyone. This boos has a big weakness for ice magic, so pelt him with Dual casts of Blizzaga, and he will fall in pretty quick order.
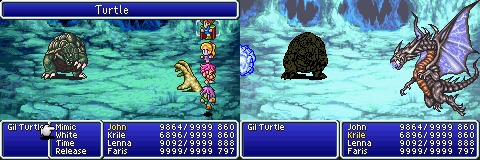
If you would like it to go a bit faster, a neat trick is to summon Carbuncle, and then bounce a party cast of Curaga off you, hitting Gil Turtle 4 times! When the battle is over, you are free to continue onwards. |
Once you have made Turtle Soup out of this boss, head down the remaining path, and into B3.
River of Souls B3
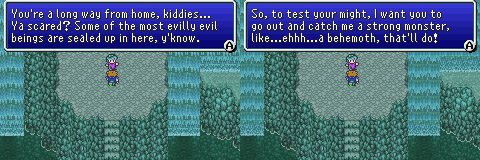
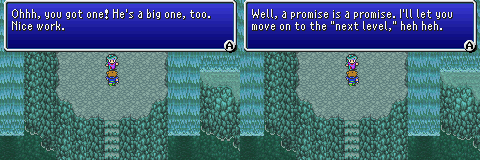
This area is definitely straight forward. Head up the left side of the door, and gather the Cottage from the chest there. Now head back, and continue to the left, until you come to a set of stairs. Go a bit past them, and get the Fuma Shuriken from the chest here. Now head up the stairs, where you will find a guy wanting you to prove your bravery to him. If you took my advice, and captured a Behemoth in Titan's Grotto, he will Drop the seal on the Arena doors, in the entrance of the temple. If you have not, (and why would you not have?) you need to catch one to continue.
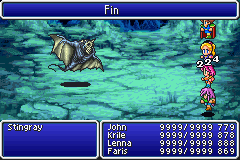 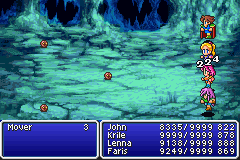 It should be noted that Movers, and Stingrays are found in B3 of the River of Souls. If you would like to get some jobs learned, or need the Mighty Guard spell, here is a far better place to do it. The enemies appear more frequently than the main part of the game. It should be noted that Movers, and Stingrays are found in B3 of the River of Souls. If you would like to get some jobs learned, or need the Mighty Guard spell, here is a far better place to do it. The enemies appear more frequently than the main part of the game.
Now you should head back to the entrance. Go back to the save in the very beginning of the temple, and save/heal. If you are short on supplies, do not have four Angel Rings, or at least two Ribbons, leave the temple, and gather them up. Before you go into the Arena, maybe you should take a little detour into the temples right side again. Instead of using the warps to go to Titan's grotto, head all the way over to the left, and through the door. You will then be in the Hall of Souls.
Hall of Souls
This is a tricky room indeed. In the left and right room, you can find two chest containing Blastshots, and Blitzshots. But there is a catch on the left side. if you try to go on the path to get them, you will wind up in a trap floor that drops you to the Hall of Doubt. Instead, before you hit the fork in the path, find the hidden path on the left side. Follow it up and around to the other side of the room. Then you can get those two chests. The other side , if you follow the path up and around, you can get those chests without fear of the trap floors. Now head down the center to the Hall of Doubt.
Hall of Doubt
There really is only one thing worth getting in here. From the doorway, head to the left, getting the Ether on the way. At the end of the path, you will find a switch on the wall. Press it to move the stone blocking the path by you. Now backtrack to the door, and go the other way. Go to the left of the switch on the wall past the block you moved, and you will find the Mace of Zeus. The next path to the left goes up to a pitfall, that drops you in the Hall of Watchman. You can either go this way, or back the way you came. Either way, you should make your way back to the save, and do just that. Now head into the arena.
Arena
Enter the arena and go down the bottom path, when it splits. Follow it up and around to the center room, gathering the Dark Matter, Holy Water, and Hero Cocktail on the way. There is also a hidden path in the bottom right side, that will take you to a chest containing the Gladius. After your looting, examine the statue blocking the way. Well, there was that guy in the Hall of Watchman, who said he had this neat stuff that can soften even the hardest of stone. Head back to the Hall of Watchman, and speak to the guy.
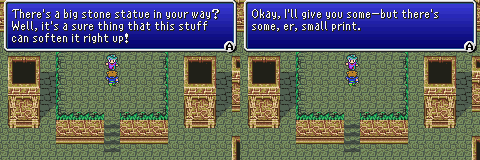
He will then hand over his miracle potion....with a catch. You have exactly 5minutes to reach your target. So before we take this lovely concoction, lets get the party set up for the inevitable fight. I had 4 Mimes for this next battle, and each had Dual Cast, White. Divide Summon, Read Ahead, Time, and Blue between them.And above all, make sure they are wearing Angel Rings!!! The entire battle can go south real fast if they are not.
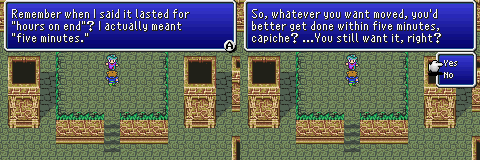
Once you are ready with everything, grab the potion from the guy. With minutes, you have little time for getting lost. Go to the warp on the bottom left, and warp to the river of souls. head through the door right above you, and through the temple's left side to the Entrance. if you have plenty of time, (and you should) go to the save, and do the usual. no head to the statue in the Arena. when you examine it this time, the potion will soften it, and you will go into your next boss fight.
  |
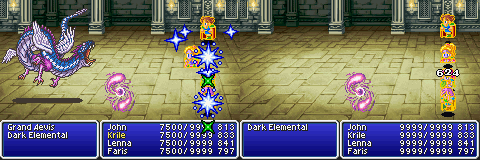
Boss Fight:
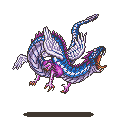
Grand Aevis &
Dark Elementals x2 |
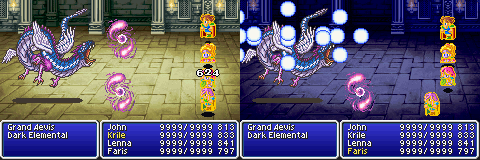
Grand Aevis is accompanied by not one, but to Dark Elementals. These two guys can heal Grand Aevis with White wind, and they typically both cast it in one turn. But be warned, that if you defeat both of them, they will come back to life. Your first person not with Blue, or Time should double cast Holy on one of the elements. This should destroy it, and make it a bit harder to heal Aevis. Have your character with Blue cast Mighty Guard, and the one with Time cast Hastega on your party, and Slowga on the enemies. Keep everyone healed while doing this. It might actually be wiser to dual cast Hastega and Slowga with Curaga to keep everyone up. When you think your defenses are set up, Dual Cast Holy on Aevis, and Curaga on yourself. Now simply keep miming the attack. Of the many attacks Aevis has, (Poison Breath, Maelstrom, Zombie Breath, Paraclete, Blaster, and Breath Wing) only the zombie attacks would disrupt the mime. With your Angel Rings, you don't have to worry about that. And since you are also healing in each turn, it is near impossible for you to die before he does. When Grand Aevis crumbles into dust, double cast Holy on the dark Elemental, and the battle will be over. When it is finally over, stumble back to the save point, and save/heal up. Now it is time for act 2 of the dungeon.
 |
Heart of Ronka: Treasure Room 
When you enter the new area, collect the two Ethers and Fuma Shurikens. Then you you should go all the way down to the bottom, grabbing the Dark Matter, two Cottages, and the blitzshot, and collect the Sorcerer's Mantle. Then go back to the split, and hang a right. Follow this path all the way into B1 (Below), and get the Kagenui. There is a Holy Water on the way to the Kagenui to get as well. Do not fall into the holes, instead return to this room, and head over to the left and down to B2.
Heart of Ronka B2
In B2, head all the way down to the room with the five chests. You will need to open the chest in the middle, and get the rock. Placing it in one of the other chests will open a door in the room. Here is the chest, and what door it opens.
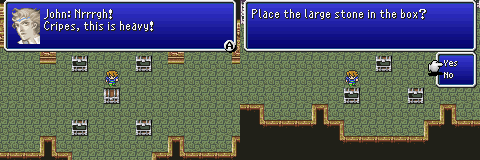
Top left chest-second door from the left.
Bottom left-opens the second door to the right. (This leads to the next area)
Top right-opens the right most door to nowhere.
Bottom right-opens the left most door.
You will definitely want to open the top left door, to get the Hyper wrist relic. Now you can place the stone in the bottom left chest, and head into B3.
B3
 Go down, and grab the chest containing a Cottage on the right path. Now you need to head over to the left, and drop down the
chain. (A). This will take you to B4. Go down, and grab the chest containing a Cottage on the right path. Now you need to head over to the left, and drop down the
chain. (A). This will take you to B4.
B4
After getting off the chain, head all the way down first, and climb up the chain marked C. This will bring you back up to B3 (Above). Now from here, head into the hidden path on the left side, and eventually you will go to the small room, with a chest in it. This is where you will get the Apocalypse Sword. And it is indeed one of the best swords in the game.
Now return to B4, and head all the way back up to chain A. Before heading up, make a little mental note that there is a warp back to the entrance to the right of the chain. Now climb back up chain A, and head up, and to the left. You will then go all the way down the path, and go into the next area.
Abyssal Falls
 Welcome to the Abyssal Falls. There is really nothing important in this area. You have two ways to go down. The first is a
direct path down the stairs to the bottom. I would suggest, however, to take the route on the right side, and collect the
Royal Crown and Cottage from the areas two chests. Then make your way down, and to the bottom. Welcome to the Abyssal Falls. There is really nothing important in this area. You have two ways to go down. The first is a
direct path down the stairs to the bottom. I would suggest, however, to take the route on the right side, and collect the
Royal Crown and Cottage from the areas two chests. Then make your way down, and to the bottom.
Abyssal Falls B2
This second area is where the journey will be divided. You will immediately notice the door under the stairway. You cannot go through it just yet, but you might want to trek into the next area below it (See below map), and collect the Dark Matter, Turtle Shell, Water Scroll, and Cottage from the treasure room. When you are done, head back into B2, and over to the switch on the left side. Grab the chest containing a Coral Ring.
Now the switch stops the waterfall that you cannot pass through. But you cannot get past it normally. Even having the Auto-Dash does not work. You either have to have the Thief class mastered for super running, or a Thief in your party to proceed. Then hit the switch and run like crazy! Once past the waterfalls, head into the Hall of Tranquility.
Abyssal Falls Treasure Room
Hall of Tranquility
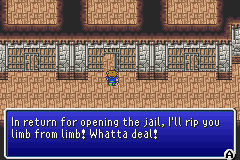
Inside the Hall of Tranquility, you will find a guy in the center of the room. Talk to him, and he will tell you about the next three targets: Archeodemon, Omega Mk II, and Neo Shinryu. He will then hand you a key to the cell where Archeodemon is, and tell you that you need to defeat him, in order to go to the final area. The warp to the final area is found at the bottom of this room, but it is currently blocked.
So let us go all the way back to the cell rooms in the left entrance, and get the fight over with. Before you head into the fight, make everyone a Mime, and give them all Dual Cast, White, and Summon. Give them all a Angel Ring, and throw them in the back rows. Now get ready for a pain in the butt fight.

|
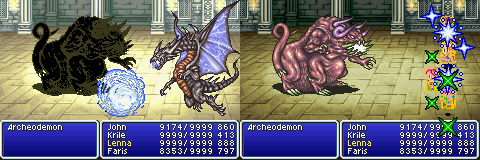
Boss Fight:
Archeodemon |
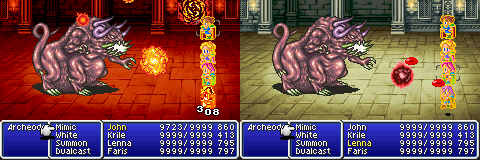
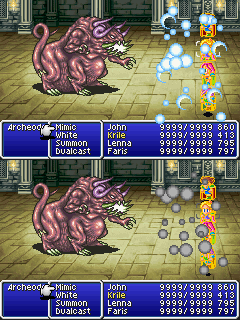 This guy has one nasty trick up its sleeve. Every time you strike it physically, it will counter by casting Death on itself. This will kill it, and bring it back to life with full HP. So whatever you do, use NO physical based attacks. This guy has one nasty trick up its sleeve. Every time you strike it physically, it will counter by casting Death on itself. This will kill it, and bring it back to life with full HP. So whatever you do, use NO physical based attacks.
So what can Archeodemon do? well, on top of having the ability to cast both Mega and Giga Flare, he has Meteor, Drain Touch, just to name a few. It is a safe bet that you will want Mighty Guard in this fight, to wheather the Giga/Mega Flare attacks.
There is a very simple means of beating this creature rather easy. Set up a Dual Caster with Summon and White Magic. Have them cast Curaga first, followed by Bahamut, and have everyone mime the attack. Curaga should always go first, to heal you from his attacks, while Bahamut deals probably the best damage to him. Within a few rounds, you should come out victorious.
 |
Once he is defeated, you will gain access to the final area of the temple. But for now, return to the Hall of Tranquility, Save/heal in the save room at the top, and enter the Tomb of Memory.
Tomb of Memory
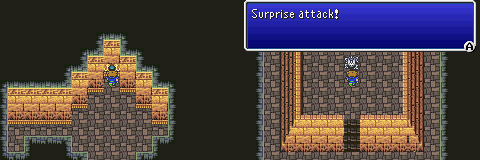
This area of the temple looks very much like the Pyramid of Moore, in the merged world. In this first room, you will undoubtedly see six machines running around. These are in fact six Omega fights. You might have been able to beat the Omega in the Dimensional Rift, (a strategy for the fight can be found in the Optional Boss page) but to take on six one after the other might very well be suicide. The best bet is to try to head to the right, and find the path leading into the next area at the top. There is usually one Omega in front of the entrance to the path to the next area, but you can easily get by him if you time it right.
Decendent's Path
In this area, you should begin by going up the path. At the end of the room, you will see a switch. Press it, and a small cut scene will reveal the shimmering blockade on the door in the Abyssal Falls disappearing. Now backtrack to the fork in the path. The right will take you to a pitfall, that drops you in the River of Souls B2. Head instead to the left, and pass the first switch you see. If you hit this switch, sand will push you into the hole. This drops you smack in the center of the room with the six Omegas. There is a slim chance of getting out of that, without combat. Head instead, to the end of the path, and hit the switch in the room. this will open the door to Omega Mk II's room. Now that you have opened the doors to the next two bosses, return to the room with the Omegas, and head back to the bottom, then left, and then go left down the center path. Take the final doorway to get to the next area.
Inquity's Path
Head down the path, until it splits up. You can either go right, and collect the Dark Matter and Blitzshot on the hidden path. When done, head right from the main path. You will see a chest in the first room, containing a Hero's Cocktail. If you think you are ready for Omega, drop into the hole next to the chest. This will drop you into the Throne Room.
Throne Room
In the throne room, you will find a switch right in front of you, press it to open the nearby door. Now hit the next switch to open the door on the right. Now head across the path to the other side. Head up, and find the switch in that room, that opens Omega Mk II's door.
If you are not at full health, or you are not ready, head back to the Hall of tranquility, and heal/save. When you get here, get ready for one heck of a fight.

|
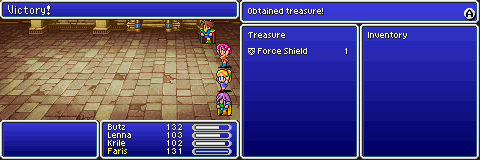
Boss Fight:
Omega Mk II |
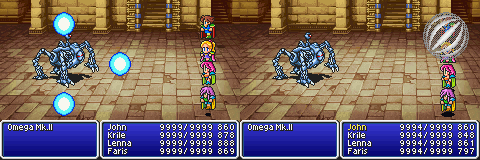
Yes this boss has a weakness to exploit, like the regular Omegas do, but there are a few catches...The first is he can change his weakness at will, and will do so at the start of the fight. Also he has a Auto-Reflect in place, so you can't scan him to figure out which is on at the time. If you think you can use magic to your advantage, have someone with a Reflect Ring on, and bounce your scan, and the spells off them.
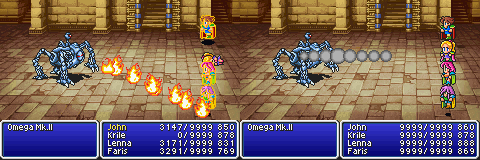
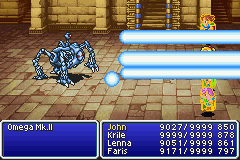 If you choose to go this route, make sure another character has White Wind at their disposal for healing. He also uses a plethora of nasty attacks such as wave cannon, Maelstrom, Earthquake, Rocket Punch, Blaster, and Mind Reader. The best way I think to beat this boss, is have everyone with the Rapid-Fire, and Spellbalde. Have everyone cast Flare to their swords, and hammer away. When you do, Omega might counter with Encircle. If it is close to the end of the fight, let that person go, and keep hammering away. If not, you might want to cast Return to begin the fight again. This is a very difficult fight, and may take several tries. Make sure you are at high 80's in level or higher first. For defeating Omega Mk II, you will get the Force Shield. This is perhaps the best Shield in the game, and well worth the effort. If you choose to go this route, make sure another character has White Wind at their disposal for healing. He also uses a plethora of nasty attacks such as wave cannon, Maelstrom, Earthquake, Rocket Punch, Blaster, and Mind Reader. The best way I think to beat this boss, is have everyone with the Rapid-Fire, and Spellbalde. Have everyone cast Flare to their swords, and hammer away. When you do, Omega might counter with Encircle. If it is close to the end of the fight, let that person go, and keep hammering away. If not, you might want to cast Return to begin the fight again. This is a very difficult fight, and may take several tries. Make sure you are at high 80's in level or higher first. For defeating Omega Mk II, you will get the Force Shield. This is perhaps the best Shield in the game, and well worth the effort.
 |
When you are done with Omega, return to the Hall of Tranquility, save/heal, and find your way back to the door you could not go through in the Abyssal Falls.
Molten Cave
In this area, you will need a Geomancer, Float, or the Light Step ability to get around to everywhere. First, go all the way up and over to the right to get the Elixir. There is a switch here, that will drop you into the treasure room, but you will want to not do that just yet. Instaed, head down the stairs into the lava floor. Make sure you cast float or have Light Step. Now head down, and over to the set of stairs in the middle of the floor. Press the switch to the right of the stairs, and create a bridge to the chest on the solitary island. This will net you another Ribbon. Now from the switch, head over to the door on the same island and go into the treasure room.
Treasure room
Head around to the left ,and over to the set of stairs. Now find your way to
the center island with all the chests. The main thing you are going for is the Maximillian Armor, but you will also get a
Phoenix Down, Blitzshot, Blastshot, Lightning Scroll, Flame Scroll, Ash, and an Elixir. Once you have looted all you can,
head back into the Molten Cave entrance. From there, head back down the stairs, and follow the lava to the right, and all
the way to the top. Here you will find the door leading to the Dragon's Hall.
Dragon's Hall
Follow the narrow bridge to the small area at the top. Here you will see one lone chest. You might already know that Shinryu
hid himself in a chest. Neo Shinryu is no different. This was the set up I used for the fight. But do not think it worked
100%. I died several times before there was success, and it was mainly due to Shinryu's two final attacks. He nailed me with
Maelstrom, and then immediately cast Tidal Wave. With my Coral Rings I was completely healed for the final wave of attacks.
Anyways here's the set up:
Have two characters as Mimes. Have one with Dual-Cast, White, and Summon. Have the other with Dual- Cast, White and Time.
Give them both A Gold Hairpin to minimize magic  consumption. consumption.
Have two Freelancers. One should have Rapid Fire, and Blue. The other should have Rapid Fire and White for added healing.
Give these two Ribbons, to avoid any unpleasant status ailments. Have one of these two equipped with the two strongest Katana's
you have. This way you score a better chance of critical hits. If you would like the best Katana in the game, head into Lethe
Court (see below) and get the Mutsunokami. Have the other with the two best swords. This should be the Apocalypse, and Ragnarok.
Be
sure to have at least 10-15 Elixirs on hand for this battle. It is going to be rough.
When you think you are ready for this fight, open the chest and have at!
 |
Boss Fight:
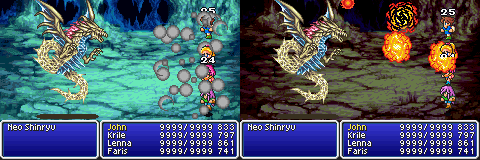
Neo Shinryu |
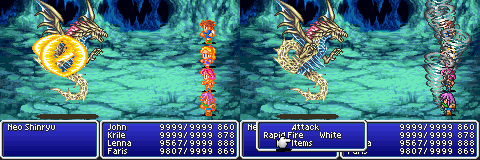
You need to set up Mighty Guard, and Hastega asap. Have the character with Dual-Castand
White go right into healing. Once Hastega is set, You should try hitting old boy with Old. It will connect, and be quite useful. But do not spend too much time trying to get it to hit. If you are failing more than not, just go into healing support. Have the two freelancers begin their Rapid Fire. A lot of the time, it will seem as though you are going to just miss. But you will get a few hits in. There was several times where i got all eight attacks to connect, and more than not the connecting attacks with the Katana's were critical.
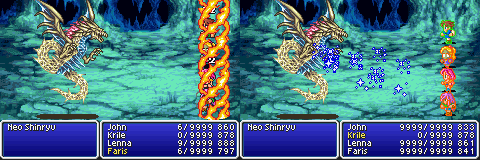
As far as attacks, Neo throws everything, including the kitchen sink at you. He has Blaze, Curse, Doom, Maelstrom, Earthquake, Tidal Wave, Mighty Guard, Poison Powder, Zombie Powder, Lightning, and White Hole to name a few. It is difficult to keep up with sometimes, but with the strategy, you should be able to pull it off. The high priority is to remain Healed at all times. This is by far the most difficult fight I have had in the entire Advance series. Do not give up, if you die. I literally died over five times before success. And even then it was a simple matter of luck. If you have found a better way to get this massive beast tamed, e-mail me, and I will place the strategy here, with credit.
|
Alternate Neo Shinryu Strategy by:
Jared |
Allow me to throw in the disclaimer that (1) I used this strategy on the iPhone, so I can't be sure that it works on the GBA version, and (2) this strategy is not foolproof; it may takes several tries to pull it off. I believe that SquareEnix designed Neo Shinryu to be one of those bosses where luck is the best weapon that your team can have.
I will give my team setup as far as class, row, abilities, equipment, and round 1 strategy are concerned, but anything after round 1 is hard to plan out because your strategy may need to be adjusted to accommodate anything that goes awry.
My party was level 80-82 when I fought "The Beast in the East", and I had done a lot of ABP grinding in the Dimensional Rift to master every class for every character (I know, it's a pain. But a great reward requires a lot of hard work). Lenna is the key to this strategy, so keeping her alive and healthy is crucial.
BARTZ: front row as Freelancer [Rapid Fire and White]
LENNA: back row as Freelancer [Jump and Time]
FARIS: back row as Freelancer [White and Blue]
KRILE: back row as Mime [Dualcast, White, and Time]
The equipment setup below goes in the order: right hand, left hand, head, body, accessory
BARTZ: Apocalypse, Ragnarok, Ribbon, Vishnu Vest, Hyperwrist
LENNA: Dragon Lance, Dragon Lance, Ribbon, Crystal Armor, Hermes Sandals
FARIS: Longinus, Holy Lance, Ribbon, Maximillian, Protect Ring
KRILE: Sage's Staff, Force Shield, Gold Hairpin, Crystal Armor, Hermes Sandals
Round 1: Make sure that everyone has float cast on them before the fight begins. If not, Neo Shinryu may pull off Earthquake and then you're up a creek without a paddle. The Hermes Sandals that Lenna is wearing will give her Haste, and she SHOULD get her move in before Neo Shinryu can pull off his deadly opening attack combo (nothing will be able to stop him from casting Mighty Guard, but even that will be dealt with soon). Lenna should use Quick and then Jump twice. If she hits with all four strikes (which isn't guaranteed, but they did for me), each hit should do >9000 damage. Krile, who is also wearing Hermes Sandals and should get her moves in ahead of Neo Shinryu as well, should Dualcast Dispel and Quick (in that order). I can't prove it, but I noticed that you are more likely to hit Neo Shinryu if his Mighty Guard is dispelled. When Krile gets her free moves (courtesy of the Quick spell), she should cast Hastega and Meteor. Meteor may not deal a great amount of damage, but something is better than nothing. Faris should cast Mighty Guard and Bartz should use Rapid Fire. If Lenna is still alive and strong after round 1, keep using the Quick / Jump combination and Neo Shinryu should fall within 2-3 rounds.
One thing I found interesting is that after the Quick spell has been cast, you can wait indefinitely to make your free moves. The protect ring that Faris has on still continues to function, however, so you can simply wait for her health to recharge via the built in Auto-Regen ability before doing anything.
I hope this strategy helps. If there are any major flaws, if there is something that I left out, please call me out on it and I will try to explain it better. |
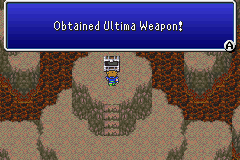
Once you have defeated Neo Shinryu, you will get the Ultima Weapon. As with other titles in the series, this is the greatest sword of the game. Now that this is yours, return to the Hall of Tranquility, and save/heal. It is now time for the final hour. |
Lethe Court
This is it, the final hour. Head through the first area, gathering the Mutsunokami and Elixir. If anyone is able to wield this katana, equip it, because it is the best in the game. It even beats out the Masamune for power and critical hits.
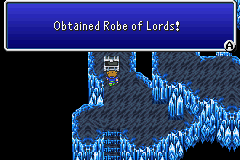
In this section, go first to the right, and climb up. at the top, you will find the Robe of Lords. This is an excellent piece of armor for any mage, or Mime. It has the best overall magic defense, as well as boosting your magic by 1 point.
Lethe Court is also an excellent place for some leveling up. You will have run ins with powerful bosses such as Iron Clads,
Hades, and Claret Dragons. Each of these enemies wield descent amounts of EXP.
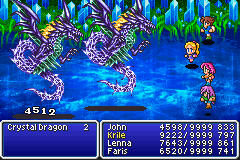
In here is also a great place to gain your Dragon Lances, if you have yet to topple Shinryu or Neo Shinryu. You will come across battles with two Crystal Dragons, VS just getting one. This will make acquiring the lances somewhat easier than in the Interdimensional Rift.
When you are ready, approach the light at the end of the area, and prepare for a boss fight.
 |
 |
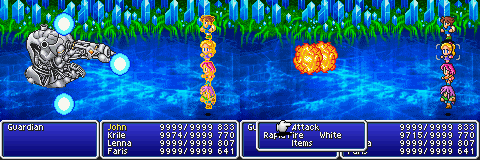
Boss Fight:
Guardian |
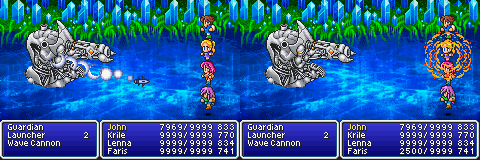
Set up your party with 3 Mimes, and a freelancer with Rapid Fire, and Zeninage. Have one Mime with Dual Cast, White, & Summon. Have one with Dual Cast, White, & Blue, and the final also set up with Dual Cast, White, & Summon. In the beginning of this fight, you will actually be fighting 3 parts. If you have a lot of money, Zeninage is definitely the way to go. Have the Mime with Blue cast Mighty Guard, while the first Summoner calls Golem to help more with physical defense. If there is a need for healing, have the summoner dual cast Curaga with Golem. In the next few rounds, just have the Freelancer use Zeninage, and everyone mime the attack. If you need to heal, have one of the casters hit Dual wield+Curaga. When you destroy the defense parts, it will be time to change it up a bit. Now have your able caster Dual wield Bahamut, or Bahamut and Curaga together. Have the Mime with Blue Mimic the double summon, and have your freelancer begin to use Rapid Fire. When the Guardian falls, you are free to continue to the end. Might I suggest heading back to the Hall of Tranquility, and healing/saving.
 |
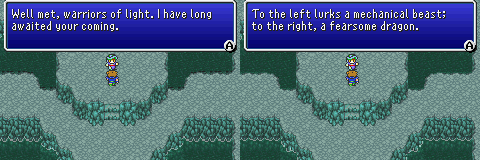
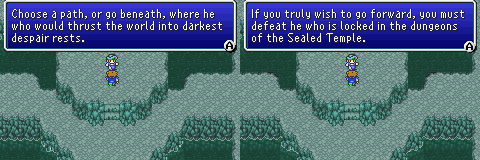
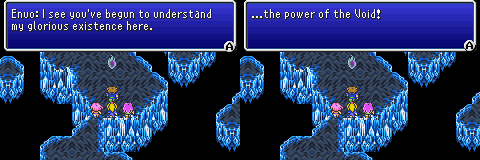
The Final Confrontation
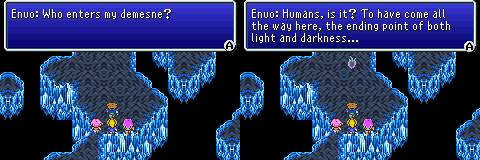
Here we are in the final section of the Sealed Temple. There is nothing to do here, but go forward, and initiate a small conversation with the final boss of the game. You will find that Enuo was not destroyed, but merely banished to the Dimensional Rift. Here you now have to destroy him once and for all.
Before you confront him, you might want to make sure you are in high levels first. Anything above 80 will do, but it would make the battle much easier to be closer to 90.
Bring lots of Elixirs, Ethers, status healing items, and Phoenix Downs. You should change out any abilities such as Zeninage out for other, more useful ones. As with almost all other bosses in the Sealed Temple, Enuo is immune to the Zeninage attack.
My set up was something like this:
Bartz-Freelancer, with Rapid Fire, and Blue.
Lenna-Mime, with Dual cast, White, and Time.
Krile-Mime, with Dual Cast, White, and Summon
Faris-Mime, with Dual Cast, White, and Summon
When you feel you are ready, head into the final teleporter. When you go into this area, step a few steps up, and you will begin a conversation with the true evil in the Sealed Temple...Enuo.
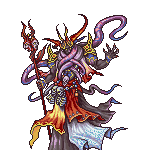 |
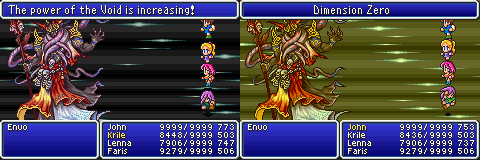
Boss Fight:
Enuo |
In the beginning of the fight have Bartz cast Mighty Guard, and Lenna hit everyone with Hastega. Have one of your Summoners use Golem as one of their first casts. Now it is time for fighting. Have Bartz begin with his Rapid Fire. Have the other three combine Curaga with either Bahamut, or Holy.
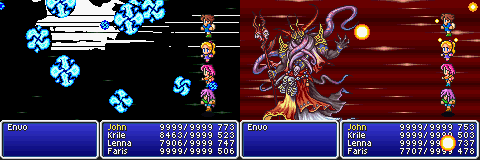
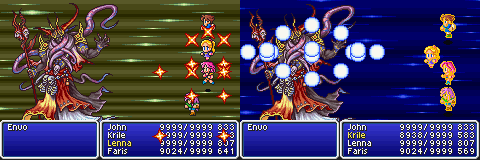
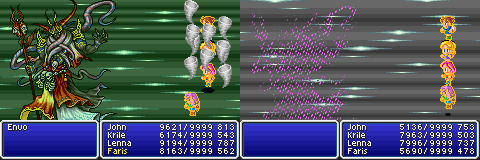
Enuo begins with the usual cast of heavy spells to throw at you. Mighty Guard should make this easy to weather. Once you see the message that the power of the Void is increasing, you need to be ready. Enuo's entire attack pattern changes. He begins using things like Meltdown Almagest, Dimension Zero, White Hole, Reaper Sword, Danse Macabre, and Grand Cross.
When this happens, you will need to pay attention more, and heal any negative effects asap. Also if a party member falls, waste no time bringing them back to life. This is a rough battle, but if you got Neo Shinryu...this battle is nothing compared to it. Eventually he will fall.
 |

Once you have defeated Enuo, you are teleported back to the beginning with the three doors. This is the end of the Sealed Temple, but now that pesky middle door will open, and you can go through the Cloister of the Dead. This is a arena of enemy encounters. A good way to level up, and or get new jobs. It also seems that the one time enemy's that dropped unique items do so again here, so it is somewhat worth the time. Congratulations on finishing the Sealed Temple!
|