|
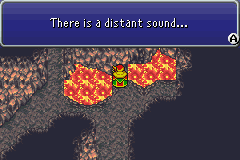
Final Fantasy VI Advance Dragon's Den
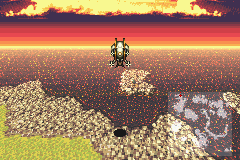
The Dragon's Den becomes available after you defeat the legendary dragons. It is located to the north of the Colosseum. When
you go in, it will be like entering Kefka's tower. You will have to choose three parties of up to 4 people.
Being of gigantic size, I have chosen to provide maps for the Dragon's Den on a separate page. You can find them here at the Dragons Den Maps
Getting Prepared
Before you even try to enter the Dragon's Den, you had better be prepared to the hilt. First you should get all your party members above 85. Me personally, I took them all the way to level 99. Make sure you learn Curaga, Arise, Reraise, and Ultima. Leveling everyone up, there should be no problem getting all the spells for everyone. Be sure to have Hi-Potions, and Phoenix Downs. As far as relics, you should have 4 Ribbons at least. You should have 3 already. One comes from the passage Locke and Celes escaped South Figaro in. The second comes from the Phoenix Cave, and the third comes from Kefka's tower. The other Ribbon will either need to be stolen from a Brachiosaur, or morphed from a Coco. You will also need 2 Genji Gloves. If you refused to help Banon 3 times, you got the first one right off the bat. The second and third ones can either be gotten in Cyan's dream, or the Cave at the Sealed Gate.
If you want an easy time fighting, you should beat the game 3-5 times. When you get to the final tier of the end fight, you should have Locke steal a Ragnarok from Lady, and a Ultima Weapon from Rest. This will give you the ammo you will need for the den. You will definitely want at least 3 Celestriad relics. This will make healing and using Ultima a lot easier. You can win these from Brachiosaurs, or you can steal them from Galypdes. You can also wadger the Soul of Thamasa relic for it, but you might want to keep that. Also for a single fight, you will want 4 Angel Wing relics.
This was my set-up for when I went in:
Party 1
Terra...LV=99
Ultima Weapon
Genji Helmet
Force Armor
Paladin Shield
Celestriad
Soul of Thamasa |
Celes...LV=99
Ultima Weapon
Oath Veil
Minerva Bustier
Force Shield
Celestriad
Sprint Shoes |
Edgar...LV=99
Ultima Weapon x2
Royal Crown
Force Armor
No shield
Genji Glove
Master's Scroll |
Locke...LV=99
Ultima Weapon x2
Black Cowl
Red Jacket
No shield
Genji Glove
Celestriad |
Party 2
Sabin...LV=99
Tiger Fang
Red Cap
Red Jacket
Ice Shield
Dragoon Boots
Dragon Horn |
Strago...LV=99
Gladius
Circlet
Behemoth Suit
Aegis Shield
Celestriad
Sprint Shoes |
Setzer...LV=99
Death Tarot
Crystal Shield
Crystal Armor
Crystal shield
Gold Hairpin
Ward Bangle |
Shadow...LV=99
Kagenui
Black Cowl
Black Garb
Thunder Shield
Sniper Sight
Dragoon Boots |
Party 3
The third party really does not matter. It should be the weakest of your parties, and you should equip Mog with the Mululu's
Charm, and sprint Shoes. The third party was not used in any of my boss fights, so the equipment should be reserved for the other two parties. But in this party, I placed Cyan, Relm, and Gogo with Mog.
Going In
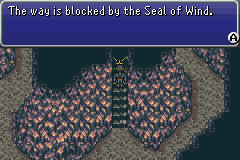 As you journey through, you will notice stairs and entrances with blocks on them. These are barriers created by the 8 dragons found within the Dragon's Den. You will not be able to pass them, until you defeat the corresponding dragon. As you journey through, you will notice stairs and entrances with blocks on them. These are barriers created by the 8 dragons found within the Dragon's Den. You will not be able to pass them, until you defeat the corresponding dragon.
When you arrive in the Den's entrance, you will notice two doors. Take party 2 & 3 into the door on the left. When inside, take party 2 to the door on the left and party 3 should go right. Walk them both through the lava area, until the get to a switch. Have them stand on the switches. Then switch over to your main party.
The main party should enter the right entrance. Once inside, go all the way to the right, and into the larger area. Pass the
stairs that are currently blocked, and head to the top. Here you will find your first Boss Fight.
 |
| Ice Dragon x4 |
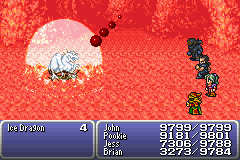 The Ice Dragon has been accompanied by two others in this fight. For a fast win,
have Edgar and Locke bash them with their Ultima Weapon/Master's Scroll combo, and have Terra and Celes devote their time
to casting Curaga. If you are level 99, Edgar should be doing 79992 damage each turn, and Locke should be tacking on another
39996. With this, the Ice dragon herd will fall pretty fast. If you feel things are going really well, have Terra cast Ultima
on the dragons for some severe hurt. For winning this battle, you will get the Final Trump for Setzer. The Ice Dragon has been accompanied by two others in this fight. For a fast win,
have Edgar and Locke bash them with their Ultima Weapon/Master's Scroll combo, and have Terra and Celes devote their time
to casting Curaga. If you are level 99, Edgar should be doing 79992 damage each turn, and Locke should be tacking on another
39996. With this, the Ice dragon herd will fall pretty fast. If you feel things are going really well, have Terra cast Ultima
on the dragons for some severe hurt. For winning this battle, you will get the Final Trump for Setzer. |
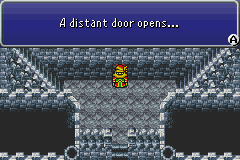
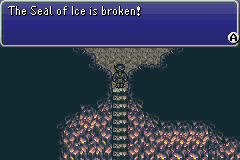 Once you are done with your first dragon, the Ice Barriers will vanish. Continue their course up the stairs, and into the door on the left side. Here you will enter the lava area. Go to your left, and press the switch. Now return to party 2. Have party 2 jump across the first set of stones, then jump across the second set. Here in the center island you will fight the Storm Dragon. Once you are done with your first dragon, the Ice Barriers will vanish. Continue their course up the stairs, and into the door on the left side. Here you will enter the lava area. Go to your left, and press the switch. Now return to party 2. Have party 2 jump across the first set of stones, then jump across the second set. Here in the center island you will fight the Storm Dragon. |
 |
| Storm Dragon |
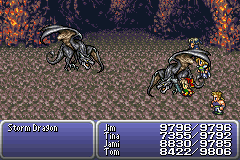 With more HP, you would think the Storm Dragon would be more difficult than his brothers you just fought. But he is not. To begin, have Strago cast Mighty Guard, Sabin use his Phantom Rush, while Shadow and Setzer Attack.Keep this going, while Strago heals with Curaga, or White wind. If things get a bit tight, have Shadow and Setzer become healers too. If Sabin is hitting for 9999 with Phantom Rush, he can take it down in 7 turns alone. When you knock the wind out of the Dragons wings, you will get the Longinus Spear for Edgar. With more HP, you would think the Storm Dragon would be more difficult than his brothers you just fought. But he is not. To begin, have Strago cast Mighty Guard, Sabin use his Phantom Rush, while Shadow and Setzer Attack.Keep this going, while Strago heals with Curaga, or White wind. If things get a bit tight, have Shadow and Setzer become healers too. If Sabin is hitting for 9999 with Phantom Rush, he can take it down in 7 turns alone. When you knock the wind out of the Dragons wings, you will get the Longinus Spear for Edgar. |
After defeating the Storm Dragon, the wind seals will be broken. Jump back over to the left, and step on the switch there.
Change to party 3, and have them jump over to the center, and then to the other side above. Grab the chest containing a Elixir. Then head into the next area. Go to the right, until you find a switch next to the wall on the south. Step on it, and it reveals a bridge. Then change to party 2, and have them go through the doorway to the left of them. In the next area, head directly in front of the door, and climb the stairs. Here you will find the Earth Dragon. Before you go into combat, equip each party member with the Angel Wing relic. Then face the dragon.
 |
| Earth Dragon |
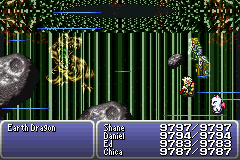 The Earth Dragon uses a plethera of Earth based spells and attacks. His favorite seems to be quake. But if you are wearing Angel Wings, that cast float continuously, you have little to fear from these. However, this does not mean you need a healer or two, to counter his powerful physical attacks. Just have Sabin use Phantom Rush, Strago use Mighty Guard, and heal, and have Setzer and Shadow attack and heal when needed. When you drop this dragon, you will get the Godhand for Sabin. The Earth Dragon uses a plethera of Earth based spells and attacks. His favorite seems to be quake. But if you are wearing Angel Wings, that cast float continuously, you have little to fear from these. However, this does not mean you need a healer or two, to counter his powerful physical attacks. Just have Sabin use Phantom Rush, Strago use Mighty Guard, and heal, and have Setzer and Shadow attack and heal when needed. When you drop this dragon, you will get the Godhand for Sabin. |
 With the defeat of the Earth Dragon, head back down the stairs, and all the way to the right, until you come to party 3. When you get there, switch back to the main party. Have them return to the place you fought the Ice Dragon. Rather than cross the bridge, head back towards the dens entrance. There in the middle of the area is a set of stairs previously blocked. Climb them, and go into the next area. Here, head to the north, and call the turtle. Take it across the water, and head north. Here, you will see a wall switch, and two sets of stairs. Press the switch, and you will view a dragon being released. We will get to him shortly. Go up the stairs, and find the Blue Dragon waiting for you. With the defeat of the Earth Dragon, head back down the stairs, and all the way to the right, until you come to party 3. When you get there, switch back to the main party. Have them return to the place you fought the Ice Dragon. Rather than cross the bridge, head back towards the dens entrance. There in the middle of the area is a set of stairs previously blocked. Climb them, and go into the next area. Here, head to the north, and call the turtle. Take it across the water, and head north. Here, you will see a wall switch, and two sets of stairs. Press the switch, and you will view a dragon being released. We will get to him shortly. Go up the stairs, and find the Blue Dragon waiting for you.
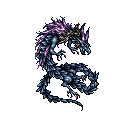 |
| Blue Dragon |
 Since we are with the main party, this should be easy. Have Edgar and Locke beat the tar out of the dragon, and have Celes and Terra use Curaga and Ultima. Try not to set anything like Haste or Protect on your characters. Blue Dragon has the ability to switch status with a character. You really do not want to help him out. Otherwise this battle is very easy. When he falls, you will get the Save the Queen for Celes. Since we are with the main party, this should be easy. Have Edgar and Locke beat the tar out of the dragon, and have Celes and Terra use Curaga and Ultima. Try not to set anything like Haste or Protect on your characters. Blue Dragon has the ability to switch status with a character. You really do not want to help him out. Otherwise this battle is very easy. When he falls, you will get the Save the Queen for Celes. |
 With the defeat of Blue Dragon, you can do some exploring in here. However at this time it is limited. Heading to the left, check out teh headstone for a little hint at something further down the journey. Keep this in the back of you mind, while you return to the bridge that your other party made. Head across it. Take the time to heal and save in the room above, if you need to. Then take your main party, and head down the path to the right of the bridge, and into the next area. Head down the small stairs to the left, and up the stairs left of that. Here you will fidn the dragon you released. Make sure you are using your main party for this one. With the defeat of Blue Dragon, you can do some exploring in here. However at this time it is limited. Heading to the left, check out teh headstone for a little hint at something further down the journey. Keep this in the back of you mind, while you return to the bridge that your other party made. Head across it. Take the time to heal and save in the room above, if you need to. Then take your main party, and head down the path to the right of the bridge, and into the next area. Head down the small stairs to the left, and up the stairs left of that. Here you will fidn the dragon you released. Make sure you are using your main party for this one.
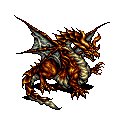 |
| Red Dragon |
 When this battle begins, cast Reraise on everyone, and then have everyone cast Curaga, or defend. You can do nothing to harm this guy. When the fight begins, he will use his Life Force to strengthen himself. Then he will lay in with the nasty spells like Flare, Meltdown, and such. The amount of times he attacks is set. When he hits the final time, he will cast Ultima followed by Flare. If you survive this, you will win. With Reraise in place you are safe. For winning, you will get the Apocalypse for Terra. When this battle begins, cast Reraise on everyone, and then have everyone cast Curaga, or defend. You can do nothing to harm this guy. When the fight begins, he will use his Life Force to strengthen himself. Then he will lay in with the nasty spells like Flare, Meltdown, and such. The amount of times he attacks is set. When he hits the final time, he will cast Ultima followed by Flare. If you survive this, you will win. With Reraise in place you are safe. For winning, you will get the Apocalypse for Terra. |
With the defeat of the Red Dragon, head back down the stairs, and go all the way to the right. Here, you will find two switches you can get to, and one you cannot. Hit the switch at the bottom, and switch to party 3. Have them come to the same place,
and step on the switch above party 1. Then change to party 2, and head past party one, to the newly opened area. Change to party 1, and have them also go into the newly opened area. Go into the next room. Here you can go all the way to the top, and enter the save room. 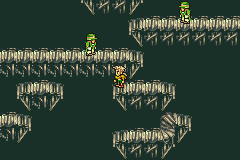 Save, and head back down the way you came. About half way down, you will find a path to the right. Go down the path, and across the bridges. You will eventually come to a ledge with a door that is blocked, and a bridge going left. Take the bridge. You will quickly see familiar people wandering across the string of bridges you have to cross. It is like Gogo's cave. You get hit by one, and you will fall off. If you do, you will land in a new area. Here you must go through the path. You will see blue flames going through the paths. If you hit them, you will have to fight the boss. There are 5 total bosses here. You should fight each one, just to get a complete bestiary. They are as follows: Save, and head back down the way you came. About half way down, you will find a path to the right. Go down the path, and across the bridges. You will eventually come to a ledge with a door that is blocked, and a bridge going left. Take the bridge. You will quickly see familiar people wandering across the string of bridges you have to cross. It is like Gogo's cave. You get hit by one, and you will fall off. If you do, you will land in a new area. Here you must go through the path. You will see blue flames going through the paths. If you hit them, you will have to fight the boss. There are 5 total bosses here. You should fight each one, just to get a complete bestiary. They are as follows:
 |
| Earth Eater |
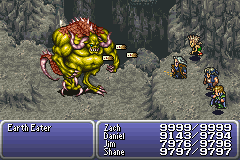 The first boss you will encounter is Earth Eater. Everytime you attack him, he retalliates with Megaton Punch. This kills you instantly. The best way to avoid this, just have Edgar attack. With his equipment, he will hit Earth Eater 8 times for 99999 damage/ strike. Earth Eater won't get to hit you back. But for some reason, if you have changed your equipment, it is still pretty easy. Have one person attack, and the next person cast Arise on the attacker. Do this over and over, until he falls. The first boss you will encounter is Earth Eater. Everytime you attack him, he retalliates with Megaton Punch. This kills you instantly. The best way to avoid this, just have Edgar attack. With his equipment, he will hit Earth Eater 8 times for 99999 damage/ strike. Earth Eater won't get to hit you back. But for some reason, if you have changed your equipment, it is still pretty easy. Have one person attack, and the next person cast Arise on the attacker. Do this over and over, until he falls. |
 |
| Gargantua |
 Gargantua hit fast and hard. He is almost exactly like Gigantos on the Floating Continent. This guy though will cast earth based spells on occasion. The first thing you should do is cast Float and Golem. Then, you can easily get through the fight. If you do not have Golem, you can substitute the Vanish spell. With your feet off the ground, and Golem taking care of the physical damage...you can just kick back and ease through the fight. Gargantua hit fast and hard. He is almost exactly like Gigantos on the Floating Continent. This guy though will cast earth based spells on occasion. The first thing you should do is cast Float and Golem. Then, you can easily get through the fight. If you do not have Golem, you can substitute the Vanish spell. With your feet off the ground, and Golem taking care of the physical damage...you can just kick back and ease through the fight. |
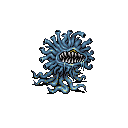 |
| Malboro Menace x4 |
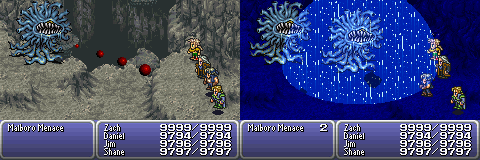
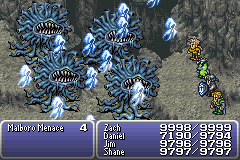 Certainly is there no more of a fight that requires Ribbons than this fight. You will start the battle out with just a single Malboro Menace. After you hit him, he will divide into 2. When you hit him next, the two parts will try to kill you with Blaster. Also being Malboros, they love to use Bad Breath. Eventually you will be dealing with four of them. Four Malboro's hitting you with Blaster, and Bad Breath...yeah recipe for disaster. Just keep everyone healed, and revive fallen members, and eventually you will overcome them. Certainly is there no more of a fight that requires Ribbons than this fight. You will start the battle out with just a single Malboro Menace. After you hit him, he will divide into 2. When you hit him next, the two parts will try to kill you with Blaster. Also being Malboros, they love to use Bad Breath. Eventually you will be dealing with four of them. Four Malboro's hitting you with Blaster, and Bad Breath...yeah recipe for disaster. Just keep everyone healed, and revive fallen members, and eventually you will overcome them. |
 |
| Abyss Worm |
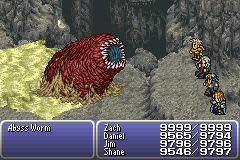 This is a easy fight. Abyss worm is similar to its Slagworm cousin. Throw up Golem to get all the physical attacks blocked. Then just beat the tar out of it with Edgar, and he should fall in one attack. Watch out for his Death spell. If it knocks someone out, bring them back into the fight quickly. This is a easy fight. Abyss worm is similar to its Slagworm cousin. Throw up Golem to get all the physical attacks blocked. Then just beat the tar out of it with Edgar, and he should fall in one attack. Watch out for his Death spell. If it knocks someone out, bring them back into the fight quickly. |
 |
| Dark Behemoth |
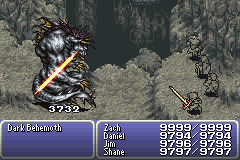 When the battle begins, cast Reraise on everyone. Then attack and heal normally. He, like his Behemoth cousins love physical attacks a lot. Hit up Golem to aid in resisting the onslaught. From time to time he will also cast Meteor. Higher level characters won't ahve to worry too much about this. If it does knock you below a comfortable level, have someone stop attacking, and heal up. When you defeat the Behemoth, he will cast Ultima. With Reraise, you will come through right as rain. When the battle begins, cast Reraise on everyone. Then attack and heal normally. He, like his Behemoth cousins love physical attacks a lot. Hit up Golem to aid in resisting the onslaught. From time to time he will also cast Meteor. Higher level characters won't ahve to worry too much about this. If it does knock you below a comfortable level, have someone stop attacking, and heal up. When you defeat the Behemoth, he will cast Ultima. With Reraise, you will come through right as rain. |
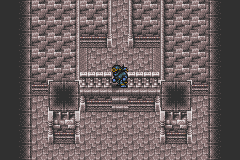
When you get to the end of this area, you will see a light. Step into it, and you will be teleported back to the bridges. Make your way across the bridges, heading all the while to the left. There is a spot where it seems going up is right. It simply leads to a dead end. You actually want to head left of where I am standing in the image (left). There is a second bridge directly to the left of you. That is your destination. Do not try and go ahead of the green dude. Yo0u will get knocked off every single time. Instead wait for him to head in that direction. Then jump on there, and slowly make your way over. sometimes when you get on his bridge, it causes the green dude to move further left. This gives you the oprotunity to get on the bridge. Now continue on, and go right of the blocked door. You will need to head all the way up, and then right across more bridges. (Do not worry, there are no green dudes here) You will eventually come to a set of stairs going up. Before heading up, equip your characters with Ribbons. Now head up, and prepare for the weirdest of all fights.
 |
| Skull Dragon |
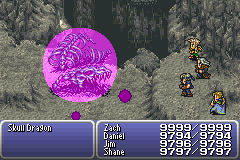 You might think you have to attack this bad guy to win. Well, think again. If you do defeat him by normal fighting, you will get a message saying the dragon cannot die until his magic is empty. Hopefully everyone knows Rasp. Just keep casting rasp on this deadbeat, until he falls. Skull Dragon has a plethora of nasty status attacks to hinder you, but the Ribbons will prevent anything from happening. He does attack physically too, so you might have to stop and heal here and there. If you run out of MP, cast Osmose on him. Not only will you get magic back, but you also hurt him too. When he finally dies again, you will get the Scorpion Tail for Gogo. You might think you have to attack this bad guy to win. Well, think again. If you do defeat him by normal fighting, you will get a message saying the dragon cannot die until his magic is empty. Hopefully everyone knows Rasp. Just keep casting rasp on this deadbeat, until he falls. Skull Dragon has a plethora of nasty status attacks to hinder you, but the Ribbons will prevent anything from happening. He does attack physically too, so you might have to stop and heal here and there. If you run out of MP, cast Osmose on him. Not only will you get magic back, but you also hurt him too. When he finally dies again, you will get the Scorpion Tail for Gogo. |
  When the Skull Dragon is defeated, a set of stairs going down will appear. (It would seem the folks at Square were nice enough to prevent you from having to jump the bridges again.) Return the party to the save room, and switch to party 2, and have
them go there as well. Before continuing, Switch to party 3. Have them go north, through the door to the next area. go up and around to the right, and stop at the ledge. Take party 2, and have them enter the door to the left. In the new room, go to the left, until you see a switch. (you should also see party 3.) Step on the switch to create a way for party 3 to come across. Change to your main party, and have them go into the same room. Instead of going left, have them go right, then up and to the left. There will be a weight above a switch. Push it over the edge. Continue to the left, veering up past the door, until you see two pools that look like eyes. In the center, hit the a button, to trigger a hidden switch the tombstone hinted at. Now return to the door, and enter the next area. In this area, go to the right, and you will find another dragon. When the Skull Dragon is defeated, a set of stairs going down will appear. (It would seem the folks at Square were nice enough to prevent you from having to jump the bridges again.) Return the party to the save room, and switch to party 2, and have
them go there as well. Before continuing, Switch to party 3. Have them go north, through the door to the next area. go up and around to the right, and stop at the ledge. Take party 2, and have them enter the door to the left. In the new room, go to the left, until you see a switch. (you should also see party 3.) Step on the switch to create a way for party 3 to come across. Change to your main party, and have them go into the same room. Instead of going left, have them go right, then up and to the left. There will be a weight above a switch. Push it over the edge. Continue to the left, veering up past the door, until you see two pools that look like eyes. In the center, hit the a button, to trigger a hidden switch the tombstone hinted at. Now return to the door, and enter the next area. In this area, go to the right, and you will find another dragon.
 |
| Holy Dragon |
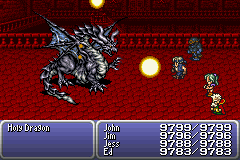 If you use your main party, this will be an easier fight. Every time you strike Holy Dragon, he will use Curaga. But only one time/attack. So if you hit him with Edgar's Genji Glove/Master's Scroll, and 2 Ultima Weapons, (he should actually die) he will only use Curaga once. Just keep doing higher damage than his Curaga heals him, and he will eventually fall. For defeating him, you will get the Zanmato for Cyan. If you use your main party, this will be an easier fight. Every time you strike Holy Dragon, he will use Curaga. But only one time/attack. So if you hit him with Edgar's Genji Glove/Master's Scroll, and 2 Ultima Weapons, (he should actually die) he will only use Curaga once. Just keep doing higher damage than his Curaga heals him, and he will eventually fall. For defeating him, you will get the Zanmato for Cyan. |
When you defeat Holy Dragon, you will need to use teleport, and warp out of the dungeon. There is another way to do this,
but it calls for completely backtracking two parties to where you fought Ice Dragon. Trust me it is easier to teleport. When you return to the den, keep your parties the same, and have party 1 and 2 enter the right entrance. Have them go to the area, where you use the turtle. Have them both cross the turtle to the other side. Take party 2 and have them go up the stairs, and to the right side. There should be a blank tomb. Stop here, and change back to the main party. From the turtle, head to the right, and into a room with tombstones. Be sure to read each one as you progress. When you get to the back of this room, you will meet your last dragon.
 |
| Gold Dragon |
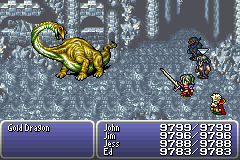 If you are a major magic user, this fight will be difficult. All spells cast will be absorbed by Gold Dragon. So you will have to stick to Attacking, and healing items. If Edgar and Locke don't get hit in the first round, they should be able to knock him out before round 2. For defeating him, you Will get Locke's Zwill Crossblade. If you are a major magic user, this fight will be difficult. All spells cast will be absorbed by Gold Dragon. So you will have to stick to Attacking, and healing items. If Edgar and Locke don't get hit in the first round, they should be able to knock him out before round 2. For defeating him, you Will get Locke's Zwill Crossblade. |
With the defeat of the Gold Dragon, you can go after Kaiser. But there is a bit more to do, if you are looking to get everything in Dragon's Den. To do so, have party 1, meet party 2 at the tombstone. Change to party 2, and have them examine the tomb.
If you read all the stones on the way to fight Gold Dragon, you should get a list of jumbled words. You need to place them
in correct order, like you did in Daryl's Tomb earlier in the game. The correct phrase should be "THE KING OF DRAGONS".

A door will open in front of you. Take party 2 inside. Here you will see a series of stairs. Begin by going down to the left, then right, pass the chest, down left, right, left. This should bring you to the bottom. Go up the next stairs to the right, over, and down the stairs. Go up the next set of long stairs, and enter the door. In this room, just go right, down and right to find a warp point. warp to the next room. In this room, you will find four chests. The two on the right contain a Ribbon, and Umaro's Bone Wrist relic. The other two chests contain Relm's Angel Brush, and Mog's Gungnir. However there is also a boss fight for each chest.
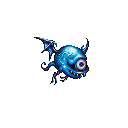 |
| Plague |
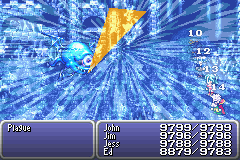 Being that this boss has very little HP compared to most bosses in the den, you should be able to wipe him out pretty quick. He loves to cast doom, so you only need to out last the countdown. If it gets too close to the end of the count, cast Reraise on the character(S). Just keep inflicting damage, and he will go down real fast. Being that this boss has very little HP compared to most bosses in the den, you should be able to wipe him out pretty quick. He loves to cast doom, so you only need to out last the countdown. If it gets too close to the end of the count, cast Reraise on the character(S). Just keep inflicting damage, and he will go down real fast. |
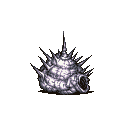 |
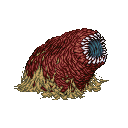
| Neslug |
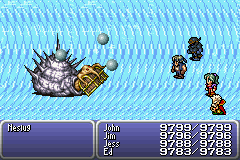 This is similar to the Ymir and Angler Whelk fights from before. You should only
attack the head. If the shell is hit, it counters with Megaton Smash. Focus on hitting the head with Firaga magic, and heal
when it retracts into the shell. Overall, this is a pretty easy fight. This is similar to the Ymir and Angler Whelk fights from before. You should only
attack the head. If the shell is hit, it counters with Megaton Smash. Focus on hitting the head with Firaga magic, and heal
when it retracts into the shell. Overall, this is a pretty easy fight. |
With these bosses gone, head south a bit, and collect the Stardust Rod for Strago. no return to the 4 chests, and continue
right to the next warp. Go right in the next room, and hit the warp point. Now in this room, go right, then up. You will see a warp point, but don't hit it. It will only go to a room with nothing in it. Instead go to the left of the warp, and head through the doorway on the south wall. Once outside again, head through the area, until you come to a ledge to the right of a blocked door. Here you should see a darkened spot on the ground. Stand on it, and it will open a doorway to the right of you. You cannot reach it, so switch over to your main party.
Have your main party go inside the cloister. Instead of following the second party's path, head over to the second set of stairs, and go down to the left, then down left again. Pass the chest, and go down the stairs to the right. This should bring you to the door your other party opened. Head inside, and go to the warp point. In the next room, you will see three chests. The left contains a Ganji Glove, while the top contains a Crystal Orb. Before opening the chest on the right, equip everyone with Ribbons. The chest on the right, contains Shadow's Orobozuki, and a boss fight.
 |
| Flan Princess x5 |
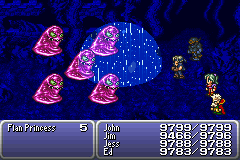 Being flans, these creatures are almost immune to physical attack. Their first attack is always Mega Berserk, which will berserk you without the Ribbons. Use lots of Firaga and Ultima, and the Flans will not last long. Also the ultima Weapons will do their regular damage no matter what. Being flans, these creatures are almost immune to physical attack. Their first attack is always Mega Berserk, which will berserk you without the Ribbons. Use lots of Firaga and Ultima, and the Flans will not last long. Also the ultima Weapons will do their regular damage no matter what. |
After de-throning the Princesses, head over and south past the warp to find one more chest. This contains a Dueling Mask for
Gau. Once you get this, there is nothing more to do. take both parties out of the cloister, and back to the Beginning This time, instead of riding the turtle, go to the right and around that way. Now when you get to the other side, call the turtle once. This will bring it back to the center of the platforms. Leave it there for now. Now, you need to get everyone back to the save room where the bridges are. (I know, we are almost done.) Ok, take party 2 and 3 into the room to the left of the save point. Here, have party 2 push the weight over again. then go down to the switch left of the way you came in, and hit it. Have party 3 find their way back across the stones, until they are in the bottom most section of this area. Now head to the north, and save at the save point. Go into the room left of the point, and enter. Walk up the path, and hit the switch. Leave them alone (for good), and change back to party 2.
 Have party 2 return to party 1. from here, go over to the doorway, before you jump the bridges. Enter, and ride the turtle across to the right. Now head up, then left to the switch. Climb the stairs, and enter the center area. Save your game at the save point, and switch to the main party. Have party 2 return to party 1. from here, go over to the doorway, before you jump the bridges. Enter, and ride the turtle across to the right. Now head up, then left to the switch. Climb the stairs, and enter the center area. Save your game at the save point, and switch to the main party.
Have your main party join party 2. But instead of going to the center room, have them go to the right room, where you enter the cloisters. There on the left side of the room is the dark spot on the floor. hit it, and have party 2 enter the new door. Here walk up the path to the switch. You are now done with party 2. Change back to party one, and head to where you fought the Skull Dragon. From here, head left across the ledges and bridges, until you get to a door. On your first venture to get the Skull Dragon, this door was blocked. you can now enter, and head to the switch.
*NOTE* The last party to hit one of the three switches, is the one who will fight Kaiser. Be sure it is your main party!
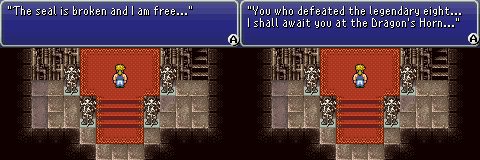
When you activate all three switches, you will be teleported to a new room. In front of you stands the lord of all dragons...Kaiser!
 |
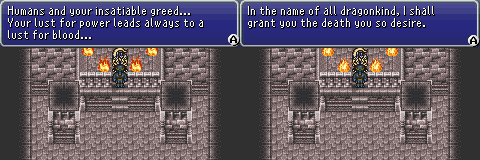
Kaiser Dragon |
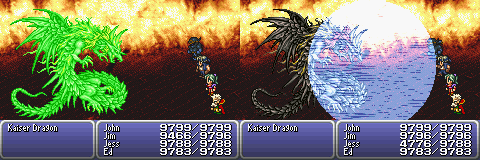
Holy Espers batman this is one tough cookie to beat. Even at Level 99, he is hard. Attacks...he has a whole slue of them just for you to not enjoy. He will freeze you 9 times out of 10 each time you strike him physically. Hopefully you ahve a fire spell ahndy, or some Flame Rods. He can cast Meteor, as well as his own kind of Meteor (Final fantasy IV style). Flarestar, Wind attacks, Delta Attack, you name it!
What is a person to do?? First round, seriously the FIRST ROUND, have two characters hit Reraise, and two characters hit Float. In the second round, have the two do the spell the other two did. Kaiser changes his attacks often, and earth is in there as well. One Quake spell will wipe you out. Float will prevent that.
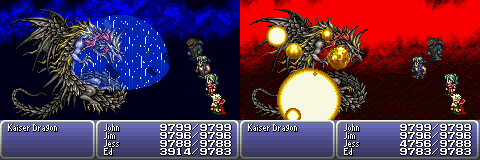
So if he freezes you for attacks, what do you do? Well, this is kind of simple too. Have two characters fight, while the other two serve as medics. Have one with a Genji Glove/Master Scroll combo hit him each time for some heavy damage. If he gets frozen, have the next caster available hit him with Fire. The same for the second fighter. Under no circumstance should you have everyone attack. He can, and probably will, hit each of you with his freezing attack...and it is game over. If you ahve a caster with a Celistriad and Soul of Thamasa, you can almost have them be the sole healer with a double shot of Curaga each turn. If this is the case, the second caster can then become a caster of Ultima to help reduce the HP even more.
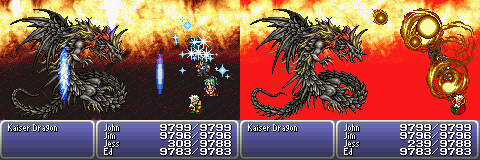
Kaisers final attack is Ultima. You want to be able to outlast that spell.Once that is done, simply have Edgar and Locke attack, while Celes and Terra continuously heal, and raise everyone. This battle might take a bit of time, but you should be able to come out easily with the stats and weapons suggested. |
When the lord of dragons finally dies, you will see a Magicite Shard appear in front of you. Grab it, and you will get the
Diablos Magicite. You will then be told of the Soul Shrine. If you have beaten the game, you can head there, and try it out. If not, you have to defeat Kefka first.
You might think you are done with the Dragon's Den huh? Well, if you leave, and come back to where you fought Kaiser Dragon,
you will find that someone got missed! And this guy is as difficult as he has been in every Final Fantasy, with the exception
of IX, and the original VI release, since Final Fantasy V. That is right, it is none other than Omega Weapon!
|
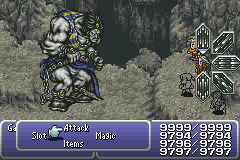
Omega Weapon |
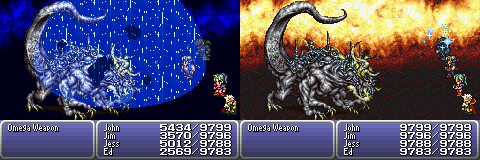
Omega would have easily killed Kaiser...if you hadn't done so first. His attacks
are more frequent, and very brutal. I would suggest placing Ribbons on all four characters. Yes sacrafice Edgar's Genji Glove. Also have one of your casters equipped with the Soul of Thamasa. And the other with the Celistriad. Change out the Ultima Weapon (If you are using it) for the ragnarok/Lighbringer. That way if you get hit hard before attacking, you are not wasting a turn making minimal damage. Shields are a must, and the best are the Paladin Shield, and Force Shields. These will aid in the magic attacks you are going to face. And trust me you are going to face a lot. Also Force Shields do not hurt at all either.
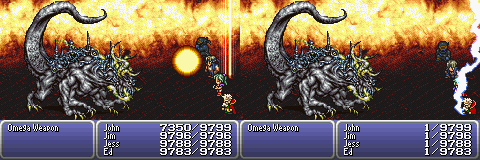
So just what can this beast of all beasts do? Well, there is just about everything in the book. Grand Delta, Ultima, (IV style) MEteor, Freezing Dust, Flaresar, Meltdown, Fallen Angel, Level 3 Confuse, Level 5 Death, Delta Attack, and finally his big big BIG attacks: Foresaken, and Omega Drive. Both of these can smear you into the wall.
In the first round, have everyone cast Reraise on themselves. Do not worry about attacking. Trust me he is not going anywhere. In the Second round, have the caster with the Soul of Thamasa hit Hastega as well as Curaga. Yes Curaga that fast. You have no idea what could happen before you get that first spell off. The second caster casts Ultima (Unless there is need to heal), while the two attackers go to town. With the ragnarok/Lightbringer, it is almost a gimme that it will set off its spell with the Master Scroll equipped. You will need all of the extra damage dealt you can muster. If things begin getting hairy, always have the other caster stop and heal as well. I had the caster with the Soul of Thamasa cast Curaga both times, no matter what. If you feel brave enough, you can change the Ribbons on your casters out, and have both equipped wiht the Soul of Thamasa/Celistriad combo. You can then have two constant Curaga and two Ultima's going out with each casters turn.
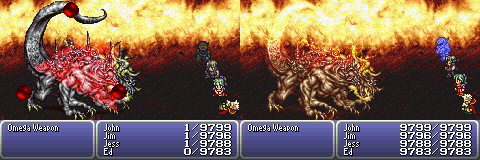
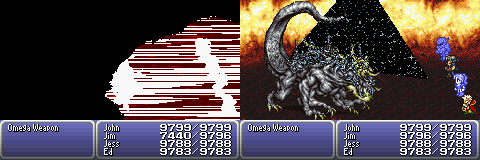
The second Omega throws Fallen Angel at you, stop and heal. If you have any Megalixirs, use them at these points in time. They seem to go through faster than spells do. If you are lucky, the healers will get you up before Omega can take you out of the fight. If not, get everyone healed first, then worry about bringing the fallen back. This is a very long and grueling fight. Even at level 99, with my stats as high as I could get them, you can see from teh image above that party members were dying still. But keep in there. You will eventually overcome this terror of Final Fantasy legend. |
With the defeat of Omega, you have finally finished everything there is to do in the Dragon's Den. Head out, and you can either finish the main game, or if that is done, you can go over, and test your skills in the Soul Shrine. Congratulations on your
Victory!!!
|