|
Final Fantasy XII Optional Bosses
There are a great many different bosses in Final Fantasy XII, that are considered "Optional". This section covers the ones that have nothing to do with Hunts directly, or Espers. These bosses are simply here for challenge. Earth Tyrant and Hell Wyrm require some conditions be met, while Omega Mark XII and Big Bomb can be fought right off the bat. I have given them the order of least difficult to hardest to beat.
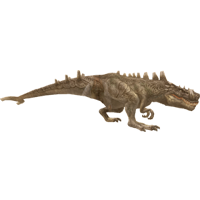
Earth Tyrant
Head over to the West Gate (Aerodome) in Rabanastre, and speak to someone named Rimzat. He will tell you that he is from Archades, and was sent to study the sandstorms of the Westersand. When the sandstorms got too fierce, he was forced to abandon his studies.He will then ask for you to gather information within Rabanastre for him on the subject.
Head over to the fountain in the Southern Plaza, and speak with a man named Cotze. He is sitting on top of the fountain. He will tell you the person you seek is a man named Northon. He can be found in Lowtown, by Storehouse 8. Northon will then advise that you need a Windvane to manage the storms. He tells you that he and Cotze had one, but they split it up. His piece is well hidden in the Westersand, under a Dynast Cactus. Now you need to find it.
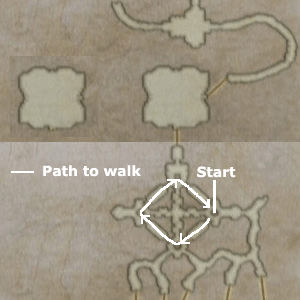
Head into the Westerand, and travel south to the next section of the map. Head all the way west, and enter the final path north. In this dead end, you will find the Wind Globe under the cactus.
Bring the piece back to the West Gate, and speak with Rimzat, Cotze, and Lorthon. They will then give the party a complete Windvane, and mention a strange egg in the desert. Now head out into the Westersand, and travel North, then head East. Here you will find the Earth Tyrant
 |
Boss Fight: Earth Tyrant |
| Level |
30 |
| HP |
70982 |
| EXP |
0 |
| LP |
21 |
| Steal |
Hi-Potion, Tyrant Hide, Tyrant Bone |
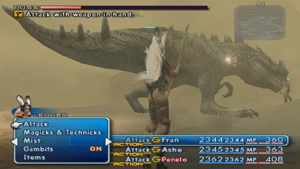 There really is not too much to this fight, Have the main attacker equip a shield, to manage the damage taken, and hit him with Decoy, Bravery, and Haste. Keep your healers out of range of the area attacks, so their damage is minimal. To get an even higher advantage, hit the reptile with Slow. This should get the fight over with pretty quickly. There really is not too much to this fight, Have the main attacker equip a shield, to manage the damage taken, and hit him with Decoy, Bravery, and Haste. Keep your healers out of range of the area attacks, so their damage is minimal. To get an even higher advantage, hit the reptile with Slow. This should get the fight over with pretty quickly. |
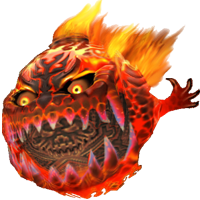
King Bomb
King Bomb is found in the Silikawood, just norht of the Teleport Crystal. You will need to defeat this boss, in order to gain access to Nabudis and finish a number of hunts.
 |
Boss Fight: King Bomb |
| Level |
34 |
| HP |
37596 |
| EXP |
0 |
| LP |
22 |
| Steal |
Bomb Shell, Fire Crystal, Bomb Fragment |
 King Bomb is fairly straight forward and simple, as long as you are prepared. He can be defeated as early as the first pass through Silikawood. King Bomb is fairly straight forward and simple, as long as you are prepared. He can be defeated as early as the first pass through Silikawood.
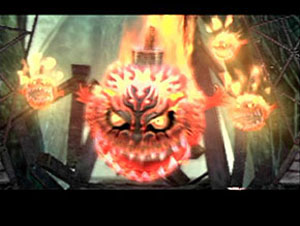
He has the ability to summon lesser Bombs throughout the entire battle, and will do so with happiness. You should get rid of these guys fast, before focusing on the leader. A double shot of Blizzara should not only get rid of the little guys, but also supply some hurt to the king. This can also build a good enemy chain, which might get high enough to supply you with chain bonuses.
King Bomb loves to hit you with Oil, then blast you with Fire magicks. This is where you might suffer the most at lower levels. Bring in and set up gambits with Handkerchiefs, to quickly remove the effect before the Fire is cast. This will help out alot with staying on top of the fight.
 After King Bomb reaches 50% health, he will use Renew. He will also do this several times. You can either draw the fight out by allowing him to use renew, or you can see about ending it before hand. If you can get off a strong enough Quickening, you can defeat the Bomb before he has a single chance to use Renew. Even if you cannot, he will stop using Renew after about 3 times. Just keep pounding away at him. He is not too difficult to take down. For some added damage and defense, have your main fighter equiped with a Icebrand, and a Flame Shield. After King Bomb reaches 50% health, he will use Renew. He will also do this several times. You can either draw the fight out by allowing him to use renew, or you can see about ending it before hand. If you can get off a strong enough Quickening, you can defeat the Bomb before he has a single chance to use Renew. Even if you cannot, he will stop using Renew after about 3 times. Just keep pounding away at him. He is not too difficult to take down. For some added damage and defense, have your main fighter equiped with a Icebrand, and a Flame Shield.
This is the only way through to Nabudis. You must defeat Big Bomb in order to get there. |
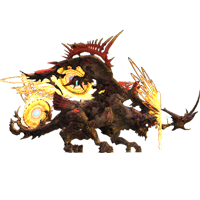
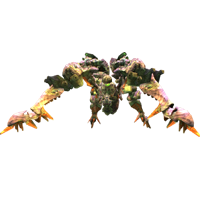
Hell Wyrm
 You must have gone as far in the story as Draklor Laboritory, before you can go after the Hell Wyrm. You will also need to complete the "Get my Stuff Back!" quest from Balfoheim. When you complete that hunt, you are given a Dragon Scale from the Vyraal. Take this scale back to where you fought the Vyraal, and locate the #10 Windmill. Speak to the Craftsmoogle there, and another man will appear. He is known as the Wyrm Philosipher, and is quite upset at the fact that he did not see the Vyraal. But when you present him with the Dragon Scale, he is overjoyed. In appreciation for giving him the scale, he hands over the Agewyrm Key, and speaks of the most terrible wyrm there is. You must have gone as far in the story as Draklor Laboritory, before you can go after the Hell Wyrm. You will also need to complete the "Get my Stuff Back!" quest from Balfoheim. When you complete that hunt, you are given a Dragon Scale from the Vyraal. Take this scale back to where you fought the Vyraal, and locate the #10 Windmill. Speak to the Craftsmoogle there, and another man will appear. He is known as the Wyrm Philosipher, and is quite upset at the fact that he did not see the Vyraal. But when you present him with the Dragon Scale, he is overjoyed. In appreciation for giving him the scale, he hands over the Agewyrm Key, and speaks of the most terrible wyrm there is.
I know, the first question you have is where is he at? Well, I will save you the trouble and tell you. He is located within the Sochen Cave Palace. In here, you need to enter the Destiny's March, and head into the Eastern most side, by means of the center area, rather than the angled paths. So if you are entering from the south, head up then right. If fromthe north, head down then left. This will prevent you from opening any doors out of order. Once you are in the Eastern side, you will need to open each of the "Door of Hours", working your way clockwise through the area. Once you have returned to where you started, a message appears saying a door has unlocked in the distance. Now head over to the western side, and open the door. Head down the long path to the next door. Here, use the Agewyrm Key, and prepare for an epic battle.
 |
Boss Fight: Hell Wyrm |
| Level |
60 |
| HP |
8930711 |
| EXP |
0 |
| LP |
150 |
| Steal |
Dark Stone, Dark Magicite, Dark Crystal |
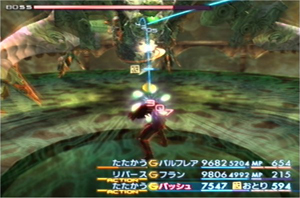
One of the harder bosses to fell, and the boss with the third highest HP in the game, it is easy to see why he can be difficult to defeat. He stands at a whopping 8 million+ in HP, and is stronger than all get. His attacks are fast and fierce, and his magicks are a wide array of elemental spells. This boss will take over an hour, even in levels above 70, so you need to first be prepared for the fight.
Begin by finding a weapon imbued with Holy. Excalibur (Found in the Great Crystal of Giruvegan) is absolutely the best bet. It would pay to have two other powerful weapons such as the Zodiac Spear (Nabudis), and Ultima Blade (Pharos at Ridorana). Now set up your gambits to have your main character Decoyed throughout the fight. Also set him with Bravery, Bubble, and add Hastega and Protectga to finish it off. You will want someone casting Shell as well, to counter the magickal onslaught you are going to get. Set your healing gambits with Curaja, as wellas making it <60%. If you want to play it safe, set your support characters with ranged weapons. The onyl real difference is how long the fight will last.
Bring in a healthy supply of Chronos Tears. Hell wyrm's Judgment attack can hit the party with Stop. You need to remove this quickly as possible. You could also try setting one character with a Power Armlet, and Esunaga to make sure everyone gets out of it. But you need to save casting time for fighting, and you will want to save as much MP as you can. Speaking of MP, set both your support characters with Ally: Party Leader/Syphon, and set it at the very top of the gambits. Now leave it shut off. when one of the supports are running low on MP, just turn the gambit on, and have them take it from the leader. Since he is doing all of the attacking, and taking all the damage, his MP will refill quickly.
 Hell Wyrm has a few attacks through the fight. The most common is the Rake attack. This is a basic physical attack that can be chained into four hits. Anyone without Bubble in effect will die with the chain. He will begin throwing elemental magick into the mix almost instantly. His favorite seems to be Darkja, so you should equip Black masks to counter it. The rest of the spells are easy enough to counter. being he is weak to Holy, you could bring in Ultima, but it is very unlikely you will get her ultimate attack in time. He has a Breakout Pentagram, that will destroy eny Esper. Besides, Mp can be best used elsewhere. Hell Wyrm has a few attacks through the fight. The most common is the Rake attack. This is a basic physical attack that can be chained into four hits. Anyone without Bubble in effect will die with the chain. He will begin throwing elemental magick into the mix almost instantly. His favorite seems to be Darkja, so you should equip Black masks to counter it. The rest of the spells are easy enough to counter. being he is weak to Holy, you could bring in Ultima, but it is very unlikely you will get her ultimate attack in time. He has a Breakout Pentagram, that will destroy eny Esper. Besides, Mp can be best used elsewhere.
The first say one half of the fight is pretty straight forward. Just have your main attacker hitting hard with Excalibur, while the other two act as support for healing, and attacking. You will need to be ready to counter his Stone Breath with Remedy or Esunaga. But otherwise keep hacking away.
When he reaches about 1/2 HP, you will see him randomly use Invert, which switches your HP and MP. Though this will leave you at death's doorstep, you should be able to heal, before he gets you. If not, quickly bring the character back, and continue. You will also the the elemental spells expand into other elements, as well as become more frequent. Shell should help out greatly with the damage, but always be aware of your HP. If it looks like you might lose someone, have the main fighter cast a Curaja spell. It will make a big difference.
 As the fight draws near to the end, he will begin using Invert frequently, as he will the magical onslaught. Be quick qith healing after Invert, and stay on top of your health. Quickenings might seem like a good thing to do now, but resist the temptation. If someone with no MP is hit with Invert, they will be Koed. Best stick to physical fighting in this one. As the fight draws near to the end, he will begin using Invert frequently, as he will the magical onslaught. Be quick qith healing after Invert, and stay on top of your health. Quickenings might seem like a good thing to do now, but resist the temptation. If someone with no MP is hit with Invert, they will be Koed. Best stick to physical fighting in this one.
when you have finally vanquished the mythical dragon, you can return to Rabanastre and speak with Montblanc. For defeating Hell Wyrm, you are given 50,000 Gil. If you have completed all other hunts, he will now tell you about the ultimate Mark: Yiazmat.
Do not get frustrated if you die. This is no easy fight, even in higher levels. Timing and patients is everything. Just get back in there, and try to defeat him again. At levels 77, 78, and 80, I was still in the fight for over an hour, and almost lost my party 3 times. So it is in fact a difficult battle. |
Omega Mark XII
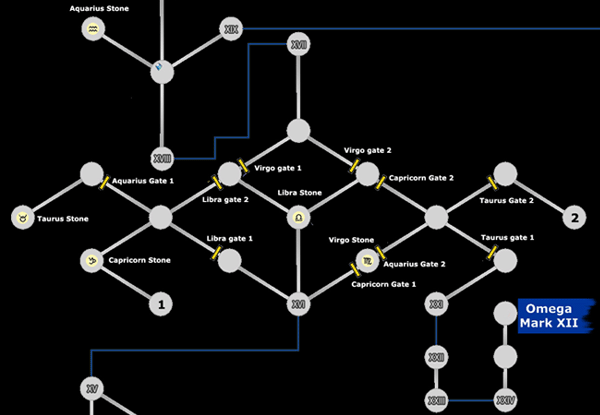
The path to Omega will take you once again into the Great Crystal of Giruvegan. You need to go the same route as you did to get to Ultima. When you get to the Save Crystal, you should save, and we will go from there.
From teh Save Crystal, go to the left, and activate the Aquarius Gate Stone. Backtrack to the previous section, and open Aquarius Gate 1. This will lead you to the Taurus Gate Stone. Instead of going to the Taurus Gate stone, Head to the Capricorn Gate Stone. Activate it, and run across the section. At the other end, activate Capricorn gate 2. Now head to the Taurus Gate Stone, and activate it. Head back across the area, through Capricorn Gate 1, and open Taurus Gate 1. The path beyond will take you to Omega Mark XII. It would be very wise to trek back to Ultima's Save Crystal, and save the game. This way you do not have to open the gates again if you die. And believe me you might do that a whole lot more than you think.
 |
Boss Fight: Omega Mark XII |
| Level |
99 |
| HP |
10370699 |
| EXP |
0 |
| LP |
255 |
| Steal |
Knot of Rust |
 This fight is almost more difficult than that of the mighty Yiazmat. This is mostly due to massive damage that is inflicted by Omega. He can wipe a 99999 HP character out in a single hit or two. His level is higher than any other enemy within the game, and he is just difficult. There is no two ways about it. With someone that hard, you might think impossible, but it can be done. It took me several tries, but I got it. This fight is almost more difficult than that of the mighty Yiazmat. This is mostly due to massive damage that is inflicted by Omega. He can wipe a 99999 HP character out in a single hit or two. His level is higher than any other enemy within the game, and he is just difficult. There is no two ways about it. With someone that hard, you might think impossible, but it can be done. It took me several tries, but I got it.
There are two spells you want above anything else in this fight...Reverse and Decoy. These are the winning key to the fight. The way you use them is also important. The main thing being they have to be on the main attacker at ALL times. Set your main fighter up with the best non-elemental weapon you have. Zodiac Spear works wonders. Next set his armor up, so that he magick resistance is as close to nothing as it can get. The reason for this, is you are going to be casting on him ALOT. You will want the spells to stick instantly.
 For your healers, make them ranged, and remove the Curaja, and or Renew spells. Replace them with gambits of Curaga that works strictly on them, not the fighter. I would suggest doing all healing manually, so as not to hit the Reversed fighter, but that is going to be too complicated. Just make sure that Curaga is for the healers ONLY. For your healers, make them ranged, and remove the Curaja, and or Renew spells. Replace them with gambits of Curaga that works strictly on them, not the fighter. I would suggest doing all healing manually, so as not to hit the Reversed fighter, but that is going to be too complicated. Just make sure that Curaga is for the healers ONLY.
Before going into the fight, make sure that Reverse and Decoy are in place. Make Reverse the top priority in both support characters gambits. As for Decoy, place it second in their gambits, but You will be casting it differently. Once you are set in the battle, switch over to one o your healers. You should now take manual control of Decoy being cast. Having Decoy on the fighter prevents anything from hitting the other party members. This is key. It should be cast for every two casts of Reverse. It will take effect even if the spell is still in effect. This will give you a continual Decoy effect. With the exception of Hastega, really all other gambits are just not worth it. Keep the Curaga gambits of course, as well as the abilty to raise fallen fighters. But all status removal gambits and such are not needed. Omega does not use them. Also place a Bubble Belt on each character. Do not try to keep up with Bubble via a spell. And trust me the extra HP is a must have thing.
 For the fight itself, Dispel him right off the bat, then get everyone in position. The main attacker should be strictly fighting. No spells at all. Take control of your chosen ranged fighter, and keep Decoy and Reverse in place. With them in place, the fight should go pretty well. If you begin running low on MP, either have a gambit set to Syphon it from the main fighter, or have some Ethers ready. One thing you cannot do is run out of MP. This fight will last well over an hour, and you need to be ready for the long haul. Slow does not work on the boss either, thus you are going to have to try to keep up with his speed. Hastega will help, but only a small bit. He will still get about two shots for every hit you provide. Sine Decoy is manual, and a constant effect, you could easily set your ranged characters with more powerful close range weapons such as Ultima Blade, Dragon Whisker, and Ragnarok, for the additional damage. This will help greatly to speed the fight along. If it gets too rough, or something goes very wrong, run to the top of the pathway out, and quickly heal. You will only have a few seconds to do so, before Omega begins healing. And he will heal to full health in a few seconds. If you can do it, before he begins healing and get back down, you should avoid the additional length of fighting again. For the fight itself, Dispel him right off the bat, then get everyone in position. The main attacker should be strictly fighting. No spells at all. Take control of your chosen ranged fighter, and keep Decoy and Reverse in place. With them in place, the fight should go pretty well. If you begin running low on MP, either have a gambit set to Syphon it from the main fighter, or have some Ethers ready. One thing you cannot do is run out of MP. This fight will last well over an hour, and you need to be ready for the long haul. Slow does not work on the boss either, thus you are going to have to try to keep up with his speed. Hastega will help, but only a small bit. He will still get about two shots for every hit you provide. Sine Decoy is manual, and a constant effect, you could easily set your ranged characters with more powerful close range weapons such as Ultima Blade, Dragon Whisker, and Ragnarok, for the additional damage. This will help greatly to speed the fight along. If it gets too rough, or something goes very wrong, run to the top of the pathway out, and quickly heal. You will only have a few seconds to do so, before Omega begins healing. And he will heal to full health in a few seconds. If you can do it, before he begins healing and get back down, you should avoid the additional length of fighting again.
You might not make it a couple of times. Do not get frustrated though. This is considered by many people to be the most difficult fight in the game. and from my own experience with it...it definitely is the most difficult battle in Final Fantasy XII.
|
|