|
Final Fantasy Advance Lifespring Grotto
The Lifespring Grotto can be accessed once you have conquered the Kraken. It is located on one of the rivers, en route to the Ice Cavern. This is where the dungeons get a little longer. This area boasts a full 20 rooms, that are over sized, and ready to challenge the dickens out of you. Be sure to bring plenty of restorative items, and Ethers for the long trek.
This is one of the most trickiest maps in the game. The white tiles disappear every few seconds. You can still follow the paths while they are gone, but if you fall off, you will begin from the beginning again.
In this map, there is also no random entrance points. Nor is there random encounters. You will enter the map in the center of the four pillars every time.
The chest in the room right below has a Crystal Helmet, while the room below that has a Sage's Surplice. Both are descent
pieces of armor. (But remember they may not always be there)
| This is the one and only ice floor in the shrine. As with the Ice Cavern, the darker areas are damage floors. This will damage you with each step for 1 HP. If you stop, the damage stops as well. There are no real threats found in this section though. I have on rare occasion, run into a White Dragon. His Ice attack can be quite a puncher. A little preparation will get you through ok though. |
 |
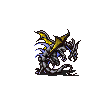
In this section, you will find Bahamut's darker half. Not necessarily evil, just darker. Like the first Bahamut who changed
you class, this one also has a task you must do to prove your worth. You are given the task of defeating a certain amount
of his kin. He will give you the number of what dragon you are to slay. For instance you might have to defeat 1 Green Dragon, 4 Blue Dragons, and a Holy Dragon. Once you have completed your task, you are free then to leave.
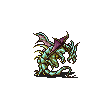
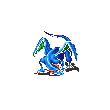
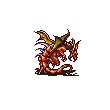
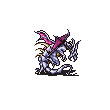
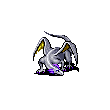
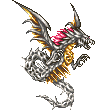
 At the request of a few people, I have decided to give the sprites for the various dragons you will face in Dark Bahamut's lair. The one to really worry about is the Holy Dragon. It loves the spell of the same name, and can easily wipe a weaker party out. At the request of a few people, I have decided to give the sprites for the various dragons you will face in Dark Bahamut's lair. The one to really worry about is the Holy Dragon. It loves the spell of the same name, and can easily wipe a weaker party out.
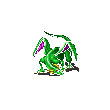
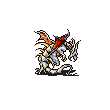
The White, Green, Red, Blue, and Zombie Dragon's are the same as the ones found elsewhere in the game.
The Black and Silver Dragon's thrive on physical attacks, but can easily be beaten with strong fighters. |
 |
 |
 |
 |
 |
| Dragon Zombie |
Blue Dragon |
Red Dragon |
White Dragon |
Yellow Dragon |
 |
 |
 |
 |
| Holy Dragon |
Black Dragon |
Green Dragon |
Silver Dragon |
 |
There is nothing real spectacular in this area. You simply need to navigate your canoe to the exit, which is the only building on the left without a red roof. |
 |
 |
| These three sections are reminiscent of the Temple of Chaos. There is a bit of trickiness in navigating your way to the exits, but it is not all that difficult. I have received a Ribbon in the chest located to the right. I found it in the long room, near the exit. This would be a great item to get, but by now I had already gotten four. The others have thus far been random items. Great to get them, but not when you are trying to get the rare weapons and armor. |
 |
 |
Durring each visit through the Lifespring Grotto, you will find these neat little areas, with dancing girls. You will go through three of the five areas at random. This is the way to figure which way you might end up taking:
Map 1 will lead to either 2 or 3.
Map 2 will take you to either 4 0r 5.
Map 3 will take you to either 4 0r 5.
The chests found seem to not appear as often as they do in the other areas. Though I have yet to get anything rare from them, this is leading me to speculate, whether or not there is something rare to get. |
The first boss encounter you will get is with Gilgamesh. He is found in the Mermaid village of Seahold. You must talk to the mermaids, in order for his location to be revealed. The red mermaid located by the destroyed robots. She will then direct you to one of three possible locations for Gilgamesh. When you find the sword, you will find Gilgamesh.
 |
 Gilgamesh hits fast and hard. The only attack that is a joke, is the Excalipur attack, from Final fantasy V. It does only a single point of damage. You should keep everyone healthy with your healer, and have the fighters focus on beefing their attacks. The Black/Red Mage can either focus on spells for damage, or healing with the White Mage. Gilgamesh hits fast and hard. The only attack that is a joke, is the Excalipur attack, from Final fantasy V. It does only a single point of damage. You should keep everyone healthy with your healer, and have the fighters focus on beefing their attacks. The Black/Red Mage can either focus on spells for damage, or healing with the White Mage.
That said, Gilgamesh is one of the easiest bosses in the bonus areas. For his defeat, you will receive the Genji Gloves, which are a great piece of armor. |
 |
The library is a bit tricky to get around in. The exit is directly north of where you enter in the bottom right corner. But you cannot just zip right up to it. That would be just too easy.
The first thing you will want to know, is you cannot go down every single isle. Some look like you can, but they only LOOK that way. You can, however, pass by any of the tables in the room. If this does not help any, here is the best way to get through the room.
From the beginning, follow the bottom of the room, until you get to the blue tiled floor. Once there, you should go right
up the first hall. Then through the one a bit to the right, followed by the one a bit to the left. This one will give you
a straight shot almost to the top of the room.
Once you hit where you cannot travel up anymore, head to the right, past
the table. Head up the next isle, veering a bit to the left at the table. When you get to the top of the room, turn and continue to the right. Follow it all the way to the corner, and down. Whoopee you are out of there. See that wasn't so bad was it? |
 |
 |
| Both of these two areas are fairly straight forward, with little challenge from the masses of enemies. That said, the one resembling the Sky Fortress seemed to have almost twice the enemy encounters of the rest of the areas. Not really sure if that is intentional or not. |
 |
Somewhere shortly after you finish off Gilgamesh, you will go into a very large room. Soon after you move up from the bottom where you enter, you will the that familiar blue flame waiting. This is the shrines second boss Atomos.
It should be noted, that after defeating him, it looks like the only thing you can do is leave the shrine. This is simply a false illusion. Follow the left most path inside the room, and you will find a door taking you back out. The exit to the next area is found there. |
 |
 Atomos has two deadly attacks. First he casts Firaga regularly, and that spell can be devastating to your party. Right off, have one of the Fighters with the highest speed cast NulBlaze. This will make that attack a lot more livable. Atomos has two deadly attacks. First he casts Firaga regularly, and that spell can be devastating to your party. Right off, have one of the Fighters with the highest speed cast NulBlaze. This will make that attack a lot more livable.
The second attack is his Wormhole attack. Like in V this attack will kill one of your characters. Have the White Mage cast Full-Life as soon as she can. Using a Phoenix Down is time consuming, since the following attack is most likely to be Firaga.
Boost your fighters attacks, and have your two mages focus strictly on keeping everyone alive. For this win, you will get
the Judgment Staff, which casts Flare as an item. For those like me who use Red Mages, this is a welcome spell to have with
no MP cost. |
There are a total of six different submerged rooms in the Lifespring Grotto. There is usually one encountered, before you reach Atomos. I have never run into one, before Gilgamesh, but that is not to say that it does not happen. They are random rooms after all.
There is nothing real major about any of the rooms either. Just a whole lot of walking here and there.
When you have finally completed your trek through all 19 different rooms, you will come across the last room of the Grotto. This houses two of the toughest bosses in the entire game. Be sure, before heading into either door, that you are at full health, and that your MP is full. I would suggest, if you have not already done it, to place the Rune Staff's you carry, and the Giant's Gloves in the top two item slots. After that, I would place Phoenix Downs, and Hermes Shoes. Follow that with any type of MP restoring items, and Elixir type items. Once you are ready, choose a door, and get ready for some fights.
The door on the left houses Omega, and the door on the right houses Shinryu.
 |
 This battle is rough as hell, no matter how high you are in levels. You should have three healers in this fight, just to keep up with Omega's assault on your party. Have the fighter with either Masamune or Excalibur boost his attacks with Giant's Gloves 2-3 times, followed by Hermes Shoes to cast Haste. The reason you do not want the Knight with the Ultima Weapon is the damage of the weapon is still determined by your HP. Even if it is boosted. This battle is rough as hell, no matter how high you are in levels. You should have three healers in this fight, just to keep up with Omega's assault on your party. Have the fighter with either Masamune or Excalibur boost his attacks with Giant's Gloves 2-3 times, followed by Hermes Shoes to cast Haste. The reason you do not want the Knight with the Ultima Weapon is the damage of the weapon is still determined by your HP. Even if it is boosted.
Omega has a plethora of nasty little attacks for you, but his Wave Cannon is devastating. Have your two non-White Mages use the Rune Staffs, while the White Mage casts Healaga every turn. If her MP gets too low, have the character fighting Omega stop and give her a Dry Ether. Do not stop any of the three others from healing. You will almost certainly regret it if you do.
With a great deal of patience you will overcome Omega. For doing so, you will get the Murasame blade for your Ninja Class. |
 |
 And if you thought Omega was difficult, Shinryu will kick you where it hurts. Flare is in fact the most lethal attack he has, and can severely hinder you party...if not kill two or three of them. His other attacks include Tidal Wave, Thunderbolt, and Ice Storm. It is wise to place a NulAll on your White Mage to counter the Thunder and Ice attacks. But spend no more time than that doing anything but healing. Again, have the top fighter (Without Ultima Weapon) use Giant's Gloves 3-4 times, and then use Hermes Shoes to cast Haste. Have the remaining three focus on healing with the Rune Staffs, as well as Healaga. It is imperative you keep on top of Shinryu's damage at all times. When the White Mage gets low in MP, have the attacker stop and administer Ethers. And if you thought Omega was difficult, Shinryu will kick you where it hurts. Flare is in fact the most lethal attack he has, and can severely hinder you party...if not kill two or three of them. His other attacks include Tidal Wave, Thunderbolt, and Ice Storm. It is wise to place a NulAll on your White Mage to counter the Thunder and Ice attacks. But spend no more time than that doing anything but healing. Again, have the top fighter (Without Ultima Weapon) use Giant's Gloves 3-4 times, and then use Hermes Shoes to cast Haste. Have the remaining three focus on healing with the Rune Staffs, as well as Healaga. It is imperative you keep on top of Shinryu's damage at all times. When the White Mage gets low in MP, have the attacker stop and administer Ethers.
Once you send this dragon into the Abyss, you will get the Braveheart sword for your fighter. When you go to leave, check the chest to the right. More times than not it has the Hero's Shield, which is the best in the game. |
|