 |
| Final Fantasy Kingdom |
 |
 Compilation of VII
Finest Fantasy For Advance
Sequels
Fabula Novis Crystallis
Tactics
Crystal Chronicles
Film / OVA / Anime
Spin-Offs
|
|
| Adding Insult to Injury |
Level |
43 |
| HP |
177365 |
 |
 |
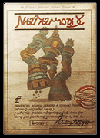
Roblon
Rank: VI
Petitioner: Morgen, Nalbina Fortress
Reward: 3100 Gil, Giant's Helmet, Mythril |
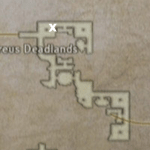
It is actually better to save this mark, until you have ventured through the Deadlands and Nabudis a few times. If you can survive the trecks, then you should have no real problem. Roblon is in the company of the Dead Bones that appear there normally. For weaker characters, this will spell disaster. Make sure your levels are at least above 50 for a smooth fight.
On his own, Roblon, like other Golems is very powerful with elemental attacks as well. He will occasionally sap your MP with Fear, so do not be afraid to hit him qith Quickenings. Opening the fight with a good chain not only will do tremendous damage to him, it can wipe the field of any stray Dead Bones. He is a bit hard to hit for major HP damage, unless you have Zodiac Spear, Ultima Blade, Etc. But you can use Expose several times to get his defense down to a good range. Souleater works too, but only if the Dead Bones are not around. |
| The Things We Do... |
Level |
42 |
| HP |
64325 |
 |
 |
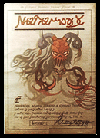
Overlord
Rank: VI
Petitioner: Insecure Seeq, Bulward's Technicks/Archades
Reward: 3500 Gil, Hi-Ether x2, Teleport Stone |
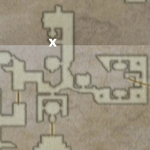
| This petitioner wants to help in the coming fight...but he most likely will not las the first round of battle. (Yea he is a wuss) Dispel Bravery from the Overlord, and get into fighting stance. Keep your two healers in the back, and unleash your main fighter with attacks. The Overlords big attack is Pyromania, which is fire based. You can reduce damage with a Flame Shield, but at higher levels, it is not that much to worry about. It will most likely be the attack that fells the petitioner though. Just continue your physical assault and keep everyone healed up. To speed the fight along, hit it with Slow and Blind. |
| The Creature Collector |
Level |
47-48 |
| HP |
224294 |
 |
 |
Goliath
Rank: VI
Petitioner: Barrong, West Ward/Nalbina Fortress
Reward: 3600 Gil, Save the Queen, Einherjarium |
This fight is similar to the fight with Roblon. Goliath is in the company of Bakanmy's, and they can actually be more trouble than Dead Bones. You might want to begin this battle with the second party's Quickening chain, to get rid of them. They are hard to hit, and can hit back with a powerful area attack. Get rid of the Bakanmy's first, then bring in your main fighters for Goliath.
Dispel Protect from Goliath, then hit him with Slow and Expose. Goliath only uses Magick attacks, and Silence has no effect on him. Set yourself up with Shell, and return with physical attacks. Keep the ranged characters out, to prevent too much damage to them, while your main fighter goes in with his assault. Have Esuna/Esunaga ready for Disable, or equip the characters with Black Belts. When Goliath's magick barrier drops, you can use his weakness to Dark, and hit him with Darkga for extra damage. |
| Dead City Watch |
Level |
44 |
| HP |
125601 |
 |
 |
Deathscythe
Rank: VI
Petitioner: Popol, Jajim Bazaar/Nalbina Fortress
Reward: 2800 Gil, Hi-Ether x2, Soul of Thamasa |
Deathscythe is another mark found within Nabudis. So have a higher leveled party before entering. Deathscythe will not appear, if you have three party members out, nor wil it appear if they are in good health. What do you do then??? Take one member out of the party, and shut the other two's healing gambits off. Run around the area fighting, until you get into HP critical stage. He will then appear. When he does, quickly bring out the third member, and turn the healing gambits back on.
Through a lot of the fight, Deathscythe will be immune to physical attacks. It is a great time to bring out the old Scathe spell. It will do good enough damage, while waiting for his physical barrier to drop. Once that happens, revert back to your physical attacks, and let him ahve it. The fight itself is not very hrad, unless you were unable to keep your bait from being KOed. |
| A Wild Stench |
Level |
50 |
| HP |
110842 |
 |
 |
Wild malboro
Rank: VI
Petitioner: Rena, The Spiritwood/Eruyt Village
Reward: 4600 Gil, Euclid's Sextant |
| Surprisingly This is really only like fighting an oversized Malboro that roams with it. You really only need to worry about its status attacks. You should first focus on the little Malboros who have joined it, then go for the big guy. Place Esunaga in top priority, since you will be using it quite a bit. Keep everyone in good health and status, and this fight will be a breeze. |
| Paying for the Past |
Level |
46 |
| HP |
187991 |
 |
 |
Catoblepas
Rank: VI
Petitioner: War-Chief Supinelu, Land of the Garif/Jahara
Reward: 3200 Gil, Volcano, Arctic Wind |
| Start this fight by casting Dispel on Catoblepas to remove Reflect, Bravery, Shell, and Protect. He will cast these again, so keep watch for it. You could also set a gambit to Dispel him when he casts them. To manage his powerful assault, hit him with Blind and Slow. This should give the party more than enough advantage. No just whack away at him, until he falls. The petitioner is going to assist in the fight as well, but do not count on him lasting too long. |
Elite marks
| Battle on the Big Bridge |
Level |
45 |
| HP |
123103 |
 |
 |
Ancient Man of Mystery
Rank: VI
Petitioner: Montblanc
Reward: 10000 Gil, Masamune |
This mark is none other than our long time friend Gilgamesh. And he is not alone either. It would seem he has found his companion Enkidu. And yes, you have to fight both of them.
When you first enter the area, Gilgamesh will show up. Your priority is his sidekick. Dispel its protections, then hit it with Blind and Silence. This will severely cripple Eknkidu, allowing you to take him out fast. You main fighter should use a weapon that allows for a shield to be equiped. Set him up with Bravery and decoy, and set the other two in range, and set them as medics. Be sure to keep them in a safe distant, so as to minimize damage. Outside of this, the first fight is pretty straight forward. Watch for the cutscenes with the different swords through the fight. These signify a different stage of the fight. With each new stage, you can steal a new item from Gilgamesh.
Stage 1-3= Potion, X-Potion, 1000 Gil, or 2000 Gil
Stage 4= Genji Shield
Stage 6= Genji Glove.
After this fight, Gilgamesh will run deeper into the mines. what? You didn't expect him to stay through the entire battle did you? In order to find him again, you will need to have completed the Antlion Infestation, and obtained the Site 11 Key. Once this is done, venture to the ends of the mines. Be very careful within the inner mine. The enemies are some of the strongest in the game. Save at the Save Crystal, and head into the final room. |
| Battle of the Big Bridge 2 |
Level |
70 |
| HP |
473246 |
|
 |
Ancient Man of Mystery Round 2
Rank: VI
Petitioner: Montblanc
Reward: 10000 Gil, Masamune |
If you thought the first fight was difficult, it was a cake walk compared to this one. Enkidu is even more powerful than before, and the combination of him and his master is deadly. Hit both with Dispelga, then blind Enkidu. Your primary focus should be on Enkidu first. Keep hitting him, until he drops. Do not worry about Gilgamesh, he will not go anywhere.
In this battle, Gilgamesh has added LV2 Sleep, LV3 Disable, and LV4 Break. The best way to avoid these, is have everyone on a level such as 35, 45, 55, 65, 75, and so on. If not be prepared to use items and Esunaga to negate the effects. Gilgamesh also can strike faster and harder in this fight, so your medics will be working in overdrive. with neither enemy having an elemental weakness, it is best to just stick with physical assaults, and reserve the MP for healing. Gilgamesh will also have 5 phases in this fight. in the fourth phase, you can steal the Genji Helmet. In phase 5 you can steal the Genji Armor. Be sure to get the Genji equipment in both fights immediately. You do not want to miss out on them. And this is the only way to get them. |
| God or Devil |
Level |
67 |
| HP |
278078 |
 |
 |
The Seer
Rank: VI
Petitioner: Montblanc
Reward: 20000 Gil, Megalixir x2 |
This mark has some things that need to be done, before you can reach it. It is located in the very bottom of the Pharos Subterra. You cannot access it, until you unlock each of the three floors. In order to do this, you must find the pedistals in the floors, and give them a certain amount of black orbs. You get the Black Orbs by defeating random enemies in the outer areas. Here is the amount of Orbs you will need in each pedistal:
| Level |
NE |
NW |
SE |
SW |
| Penumbra |
18 |
9 |
3 |
6 |
| Umbra |
15 |
9 |
15 |
18 |
| Abyssal |
15 |
21 |
27 |
12 |
The enemies in here are very strong, and can come in massive waves. Be prepared to flee if you can. This is a really difficult area, and really should not be ventured into, until you pass level 55. If you can handle the Nechrol of nabudis with little to no problems, you can get through this with a little difficulty. In the Penumbra, you will run into the Phoenix. This is a hidden boss, that you must fight to get to The Seer. Also you must NOT, fight Magick Pots. They will get very angry, and decimate your party with powerful spells. The only way to defeat them is by first giving them an Elixir/Megalixir. Then you can attack them. You can also steal back the Elixir, before defeating it. But there is no real benefit from attacking them. Unless you are going for LP, in which they provide 123 LP. (246 if you are wearing a Golden Amulet). Go through, and light each levels four pedistals. Then head to the final floor.
The Shadow Seer is a completely different battle from all other marks. He will immediately set up protection from physical nd magickal attacks. He then summons helpers to fight, while he begins unleashing magick attacks on the party. Your focus should be on his helpers, since his protections will not go away until they are all defeated. He will bring out one helper in this order: Pandaemonium, Slyt, Fenrir, and Phoenix. each of these enemies are the exact same as the first time you fought them. Just get through them as quickly as possible, so you can get to the real fight.
when Seer's protections are removed, bombard it with physical attacks, and Quickenings as they become available. He will steal your MP with Fear, so saving MP is not a priority here. Towards the end of the fight, the Seer will drastically increase his defense, so try to finish him off with a Quickening chain or magick. This can get a bit difficult though with Fear being used. |
|
|
|